Configure audit logging
Casewhere audit logging tracks data changes at the field level, providing answers to:
- Who made the change?
- What was changed?
- When were the changes made?
- Who can access the log data?
Enable audit log in data class
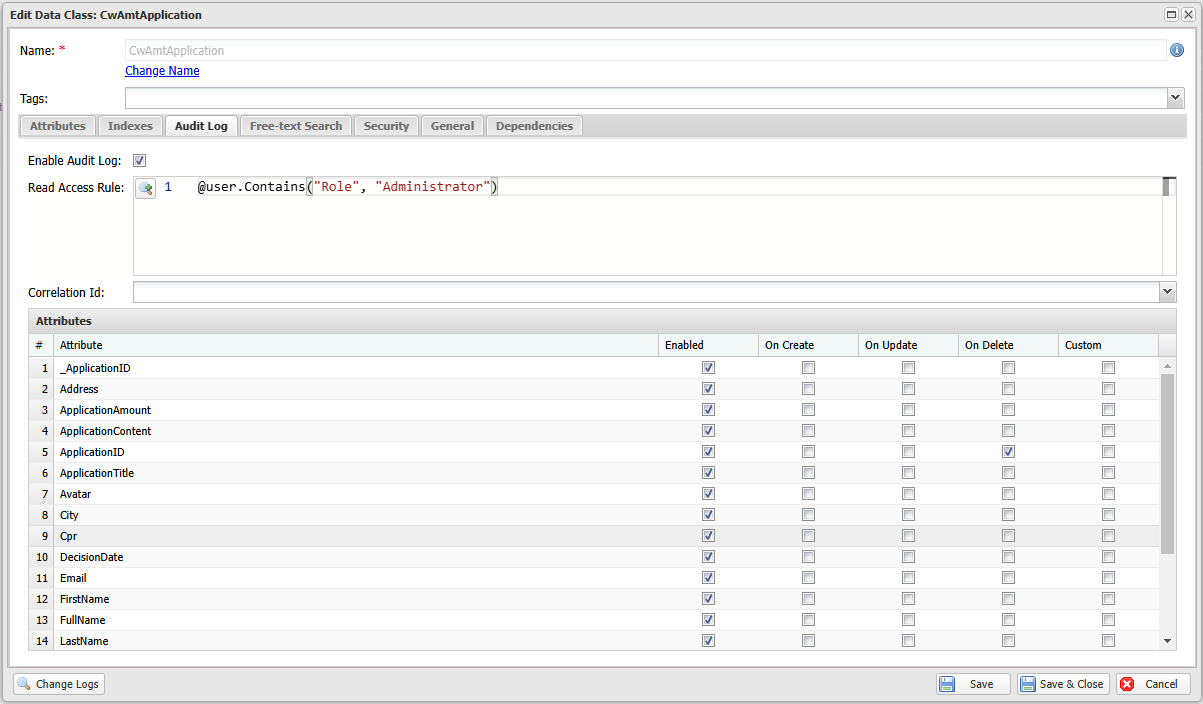
In the Data Class editor, navigate to the Audit Log tab and configure the following:
- Read Access Rule: Controls who can access the log data. See access rules for configuration details.
- Correlation Id: Identifies related log entries.
- Attributes: Select fields to track. You can control per-field access via access rules.
- Log data can be enriched with additional information to make it easier to interpret. For instance, logging the
Application IDandApplication Titlewhen an application is deleted allows users to identify what was removed. Each audited attribute can be enriched per event using the On Create, On Update, On Delete, and Custom options, which copy the attribute's value into the log entry for that event. This is especially useful for On Delete, since the deleted object's field values are otherwise not recorded.
- Log data can be enriched with additional information to make it easier to interpret. For instance, logging the
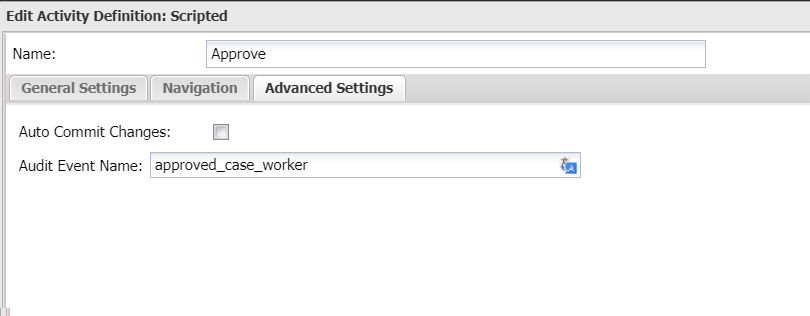
When the audit log setting is enabled for a data class, all changes to its data objects will be logged. By default, Casewhere uses the activity name for the log event, but this can be customized. To do so, in the Workflow Definition, go to the Advanced Settings tab and enter a custom Audit Event Name.
View audit log in worker site
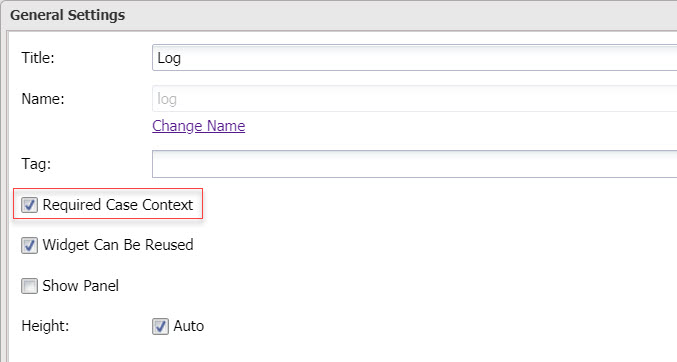
Create a page with a custom widget Log. The widget needs a case id to query data, so the setting Required Case Context must be enabled.
The widget template is as follows:
- Html
<div class="row flex-grow">
    <div class="col-12">
        <cw-audit-log data-config="auditLogConfig"></cw-audit-log>
    </div>
</div>
- Javascript: in the scope of customWidgetController, append the following code:
$scope.auditLogConfig = { caseId: $scope.widgetModel.queryParameters.CaseId, pageSize: 10};
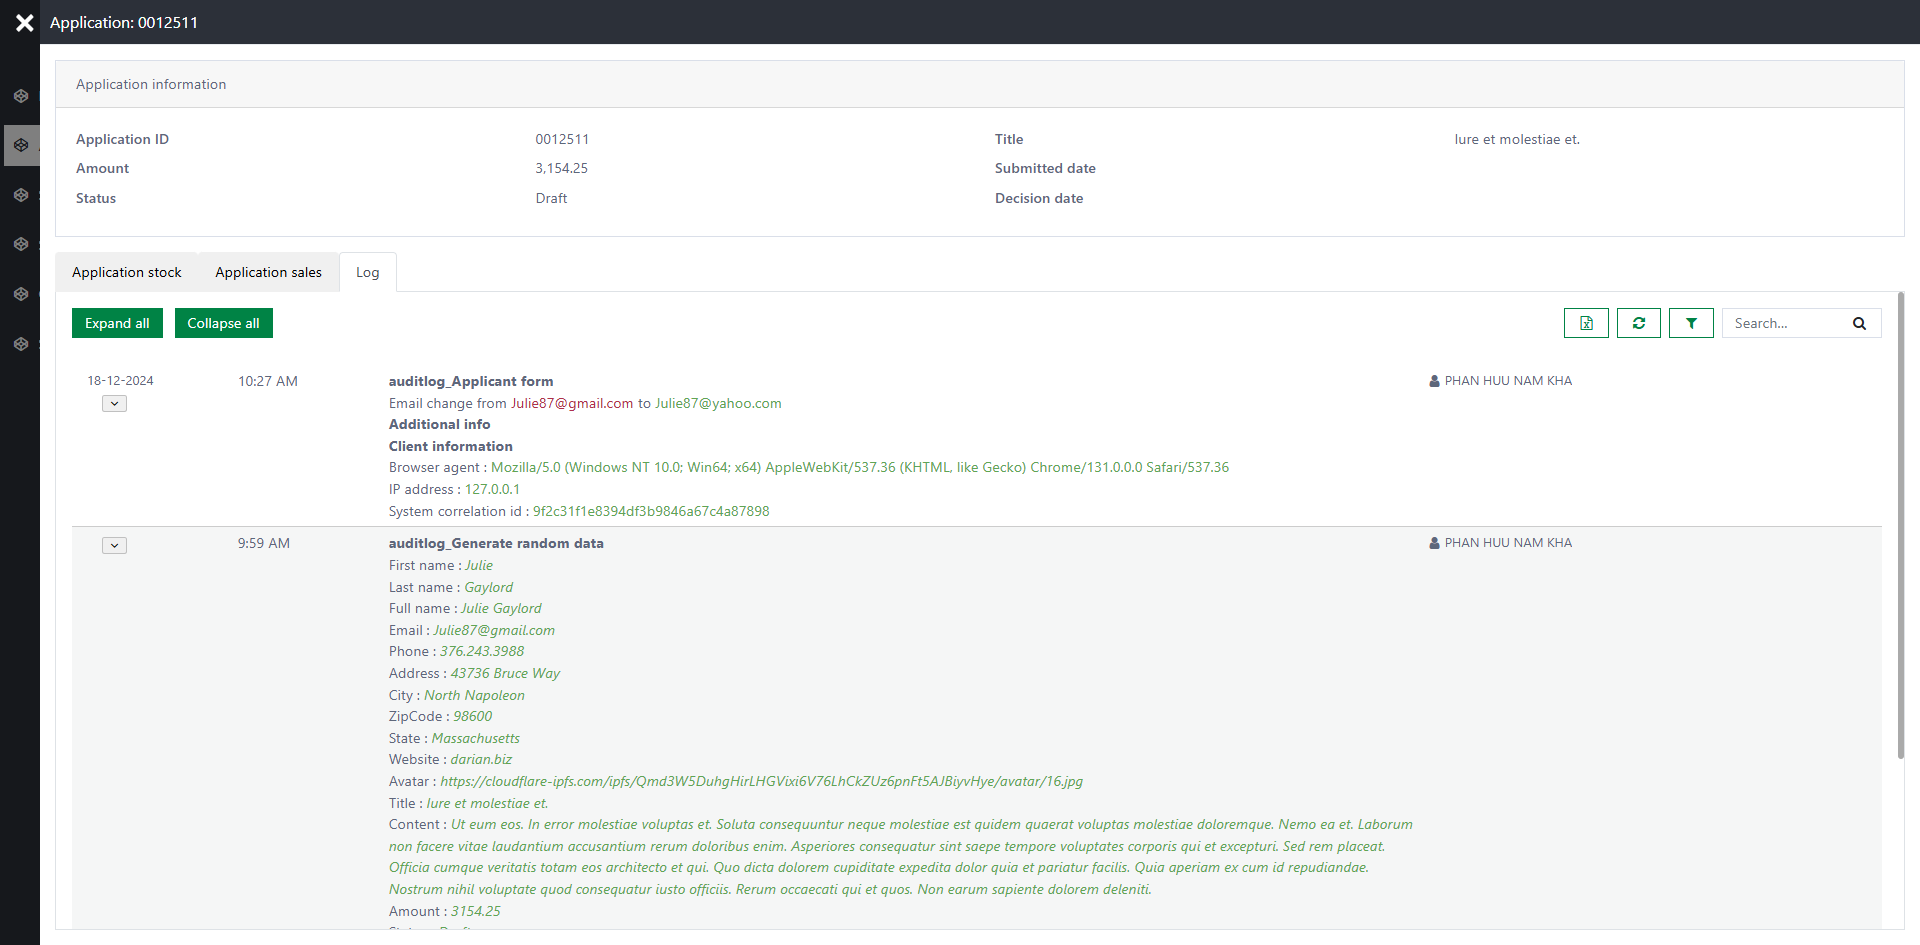
Select a case from Application List to open the log viewer using Open Page action. Following parameters are required for the log viewer to work:
- Id: {{dataObject.Id}}
- CaseId: {{dataObject.CaseId}}

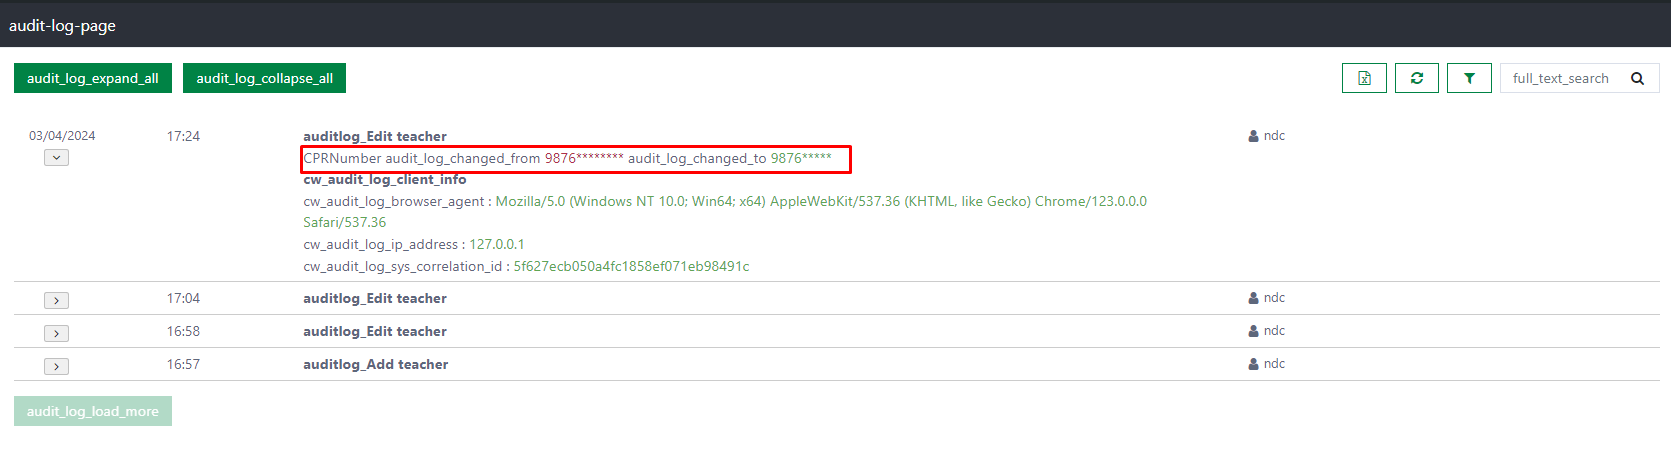
The logging page will appear as shown below:
Protect sensitive attributes
Sensitive data (e.g., credit card numbers, CPR numbers) can be masked in the audit log. Here's how to protect a CPRNumber attribute in the Teacher data class:
- Open the Teacher data class. Enable the Encrypted property on the CPRNumber attribute.
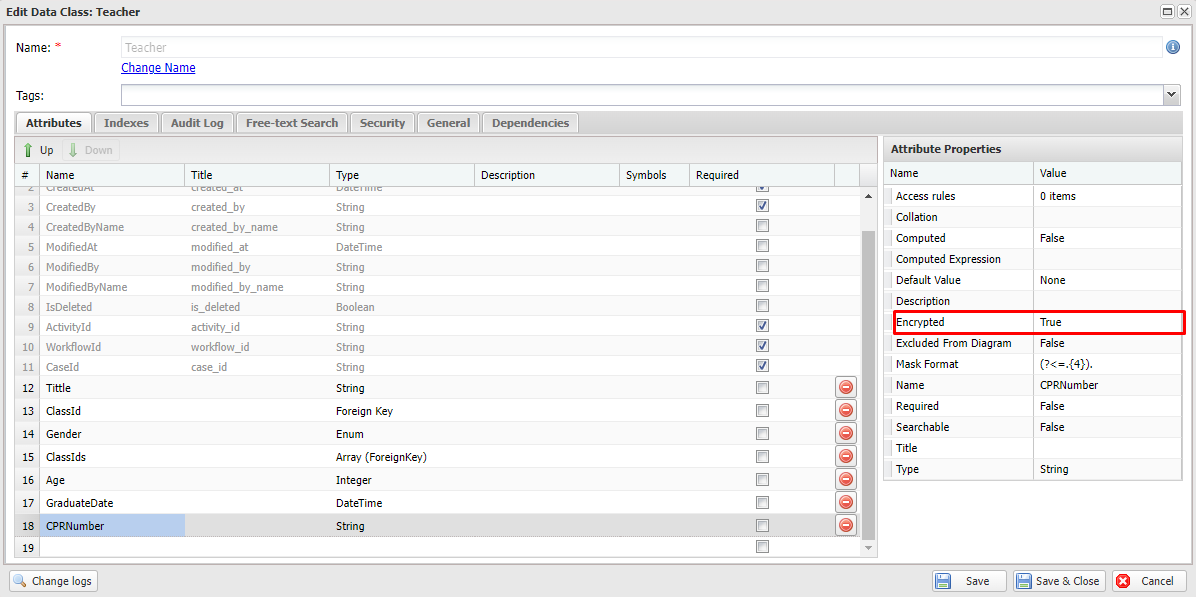
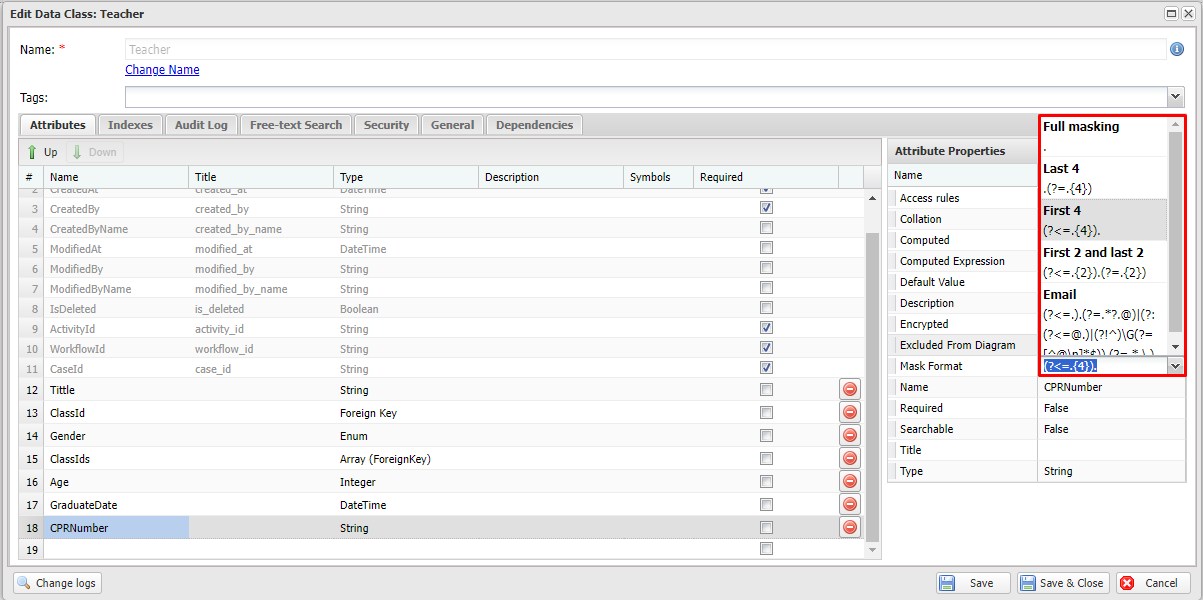
- Choose a MaskFormat to control how the value is displayed. For example, First 4 displays
123456789as1234*****.
- Navigate to the Audit Log tab. Ensure the Enabled option is checked for CPRNumber. Define an access rule for the encrypted attribute to control who can view the unmasked value. For example, only users with the Manager role:
@user.Contains("Role", "Manager")
Learn more about Casewhere rules.
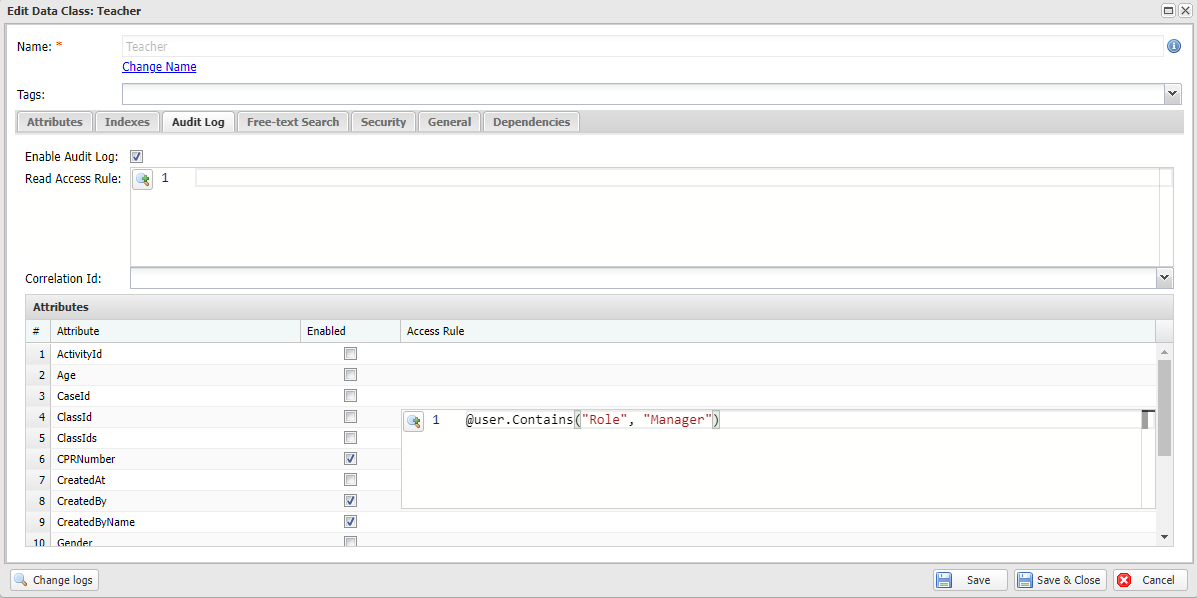
- Users without the Manager role will see the masked value in the audit log viewer.