Form validation
Validating data is always the most critical step in every business workflow, especially where it requires user interaction. Understanding the challenge, Casewhere offers many validation methods that work out of the box for developers while still giving them the flexibility to implement the most complex business requirements.
Basic validation configuration
Required validation
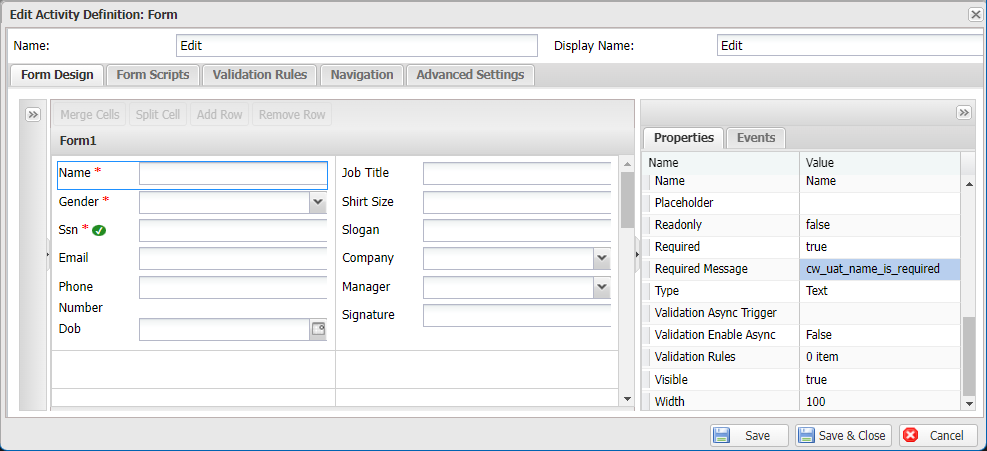
All form component has a property Required. When the property is enabled, users must enter a value in order to submit the form successfully. It's possible to customized the Required Message, which will be displayed to the end users. The Required Message accepts a text resource key.
The below example shows how the property is configured in Casewhere Admin,
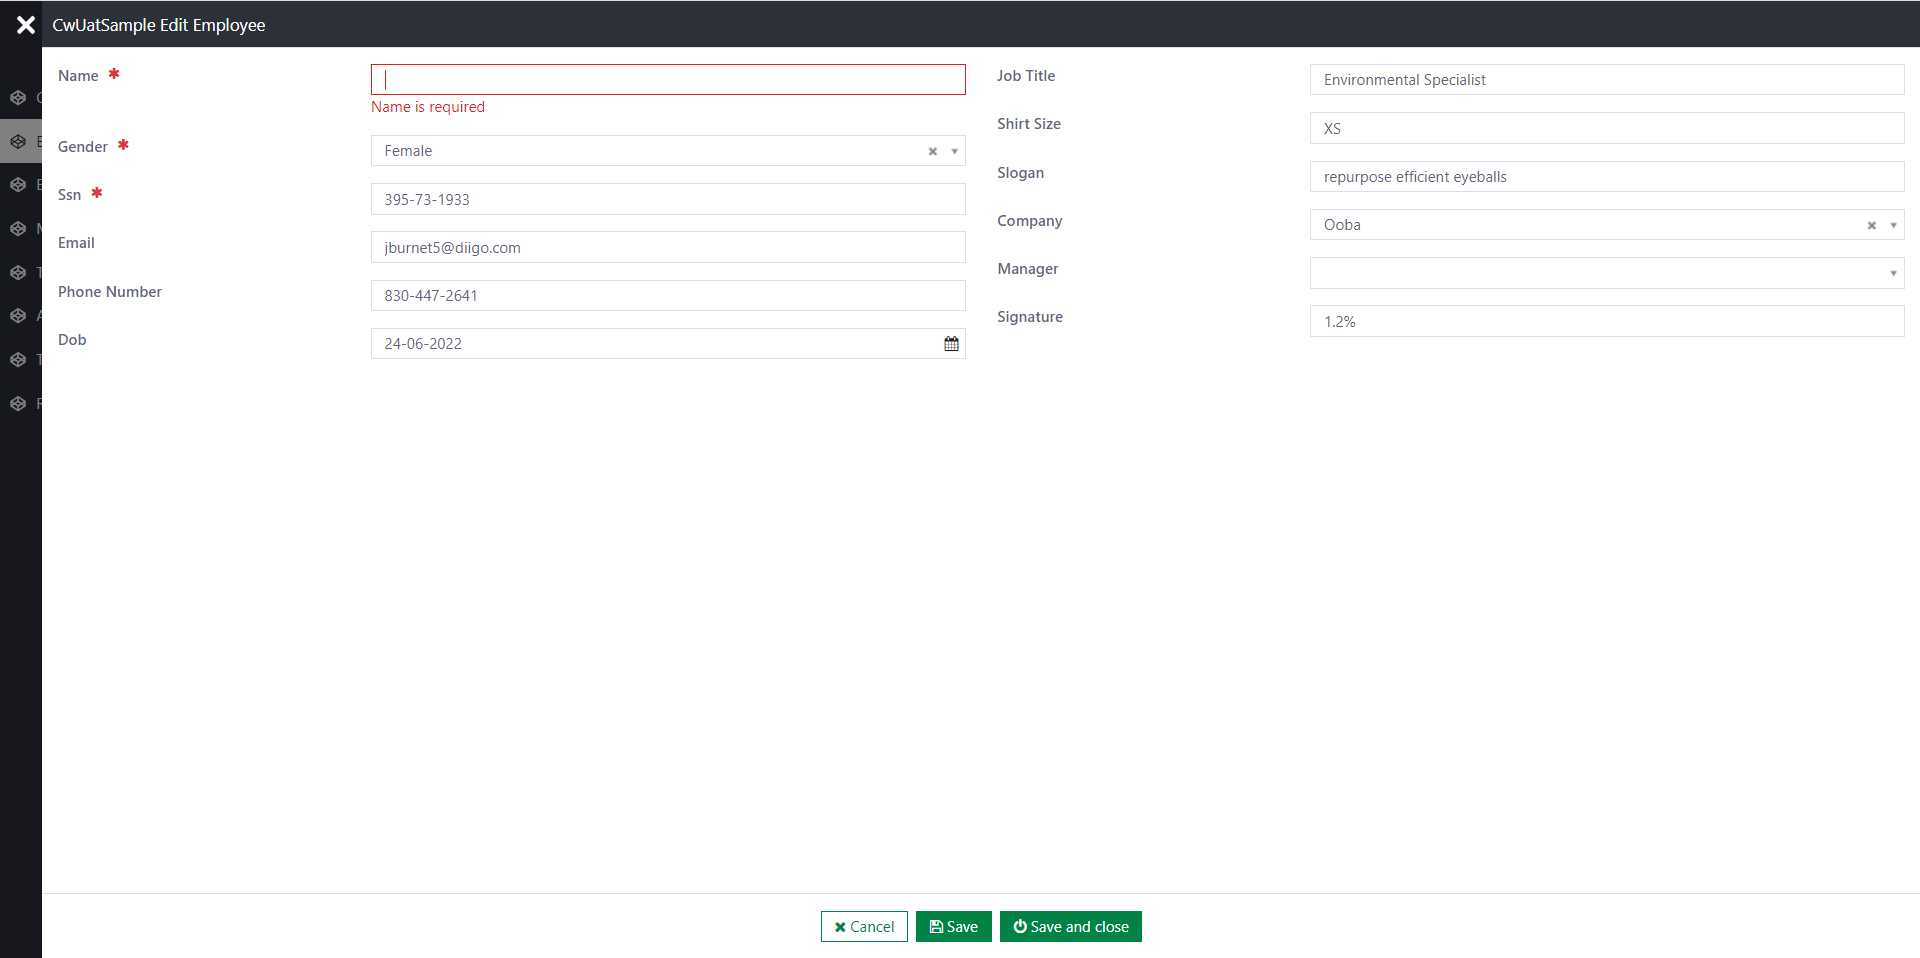
and here is how the validation works for end users in worker sites.
Component-specific validation
Each form component has a different set validation properties. Below are some typical components and their validation properties you might usually work with.
| Component | Property | Description |
|---|---|---|
| Textbox | Max Length | The maximum number of characters allowed |
| Textbox | Min Length | The minimum number of characters required in an input field |
| Numeric Textbox | Max Value | The maximum value |
| Numeric Textbox | Min Value | The minimum value |
| Datepicker | Max Date | The maximum value |
| Datepicker | Min Date | The minimum value |
| File Upload | File Extensions | The acceptable file extensions |
| File Upload | File Size | The maximum size in MB allowed to be uploaded |
| Masked Textbox | Mask | The pattern of input |
Component validation rules
Since version
2.7.2, we recommend configuring validation rules at the component-level instead of managing them at the form-level in previous versions.
Casewhere allows configuring validation rules for form components. Select the component you want to validate, in the Properties tab pane, select Validation Rules. It's possible to add multiple validation rules for a component. Components having validation rules will have a green tick icon in the form editor.
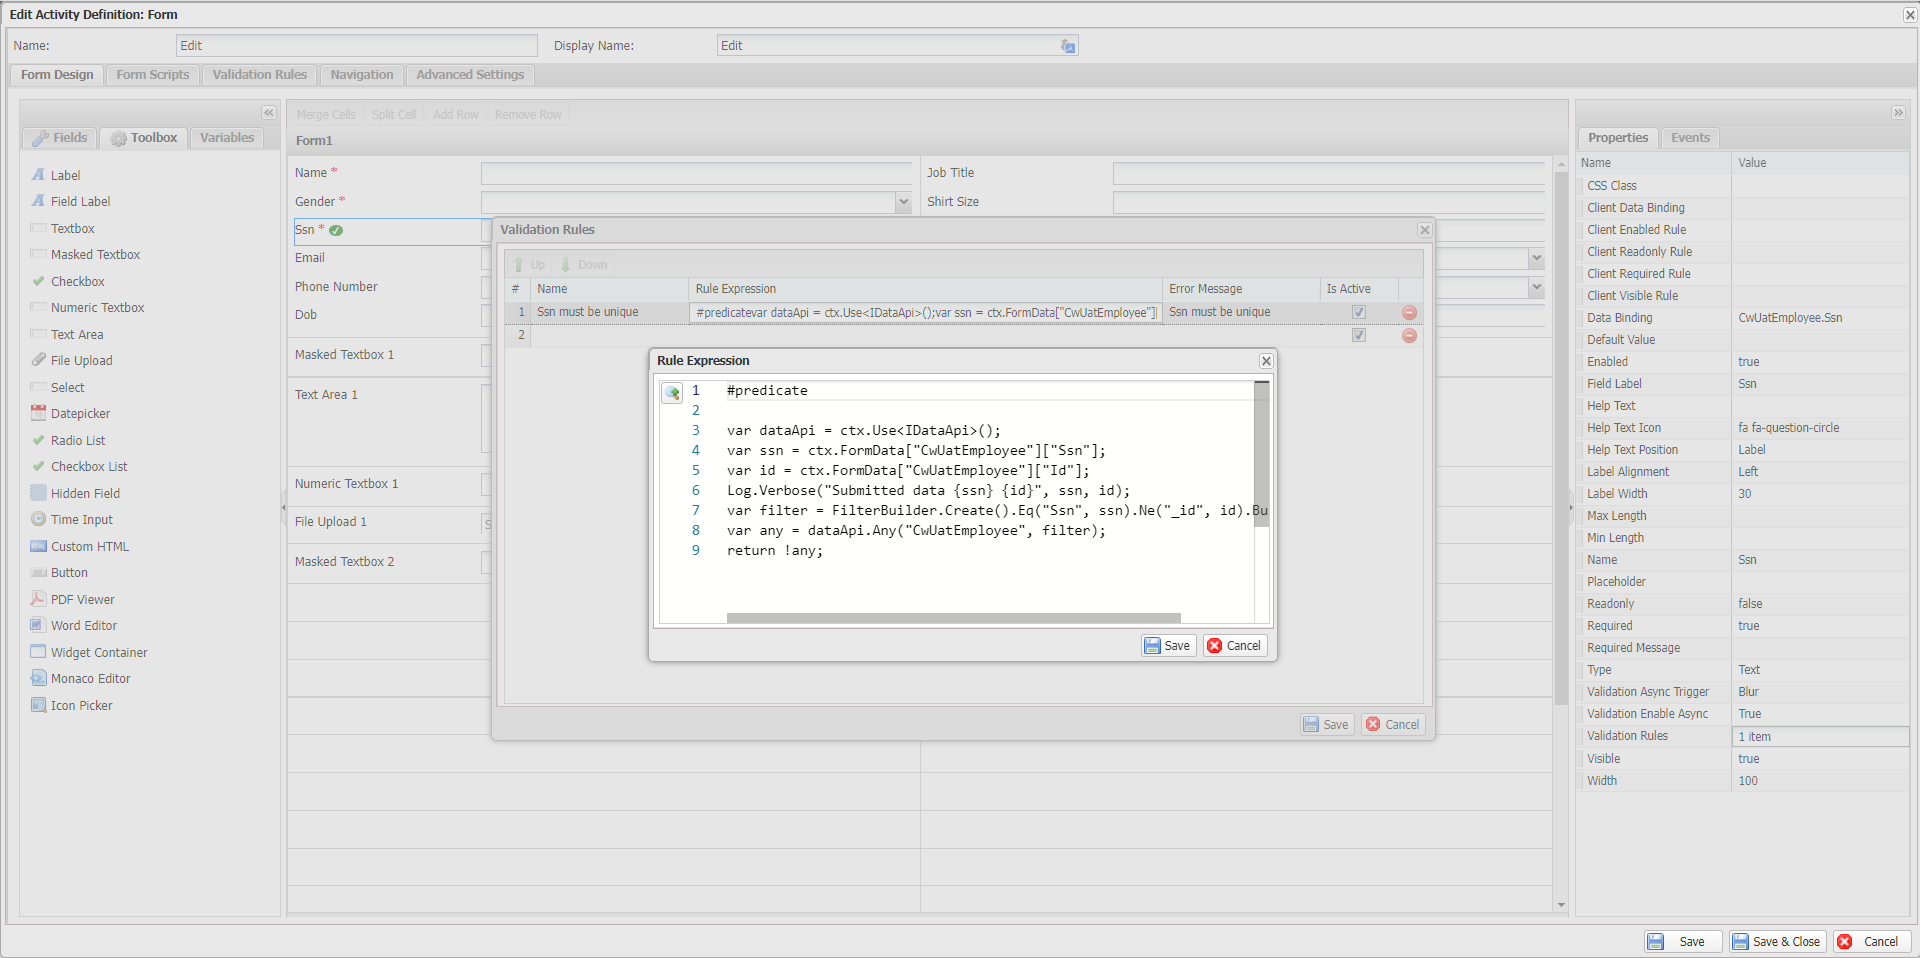
A validation rule is a boolean expression. The validation passes if the rule returns true. The rule accepts the @ctx keyword to access the workflow data. You can learn more about writing rules here.
Example: Verify if users enter a unique Ssn
#predicate

var dataApi = ctx.Use<IDataApi>();

var ssn = ctx.FormData["CwUatEmployee"]["Ssn"];
var id = ctx.FormData["CwUatEmployee"]["Id"];

var filter = FilterBuilder.Create().Eq("Ssn", ssn).Ne("_id", id).Build();
var any = dataApi.Any("CwUatEmployee", filter);
return !any;
Instant validation
By default, Casewhere only validates when users submit data, i.e., click the save button in the workflow wizard. Many applications trigger validation right after users input data to improve user experience. Understanding the need, Casewhere supports instant validation that triggers validations based on various component events by utilizing the same validation rules.
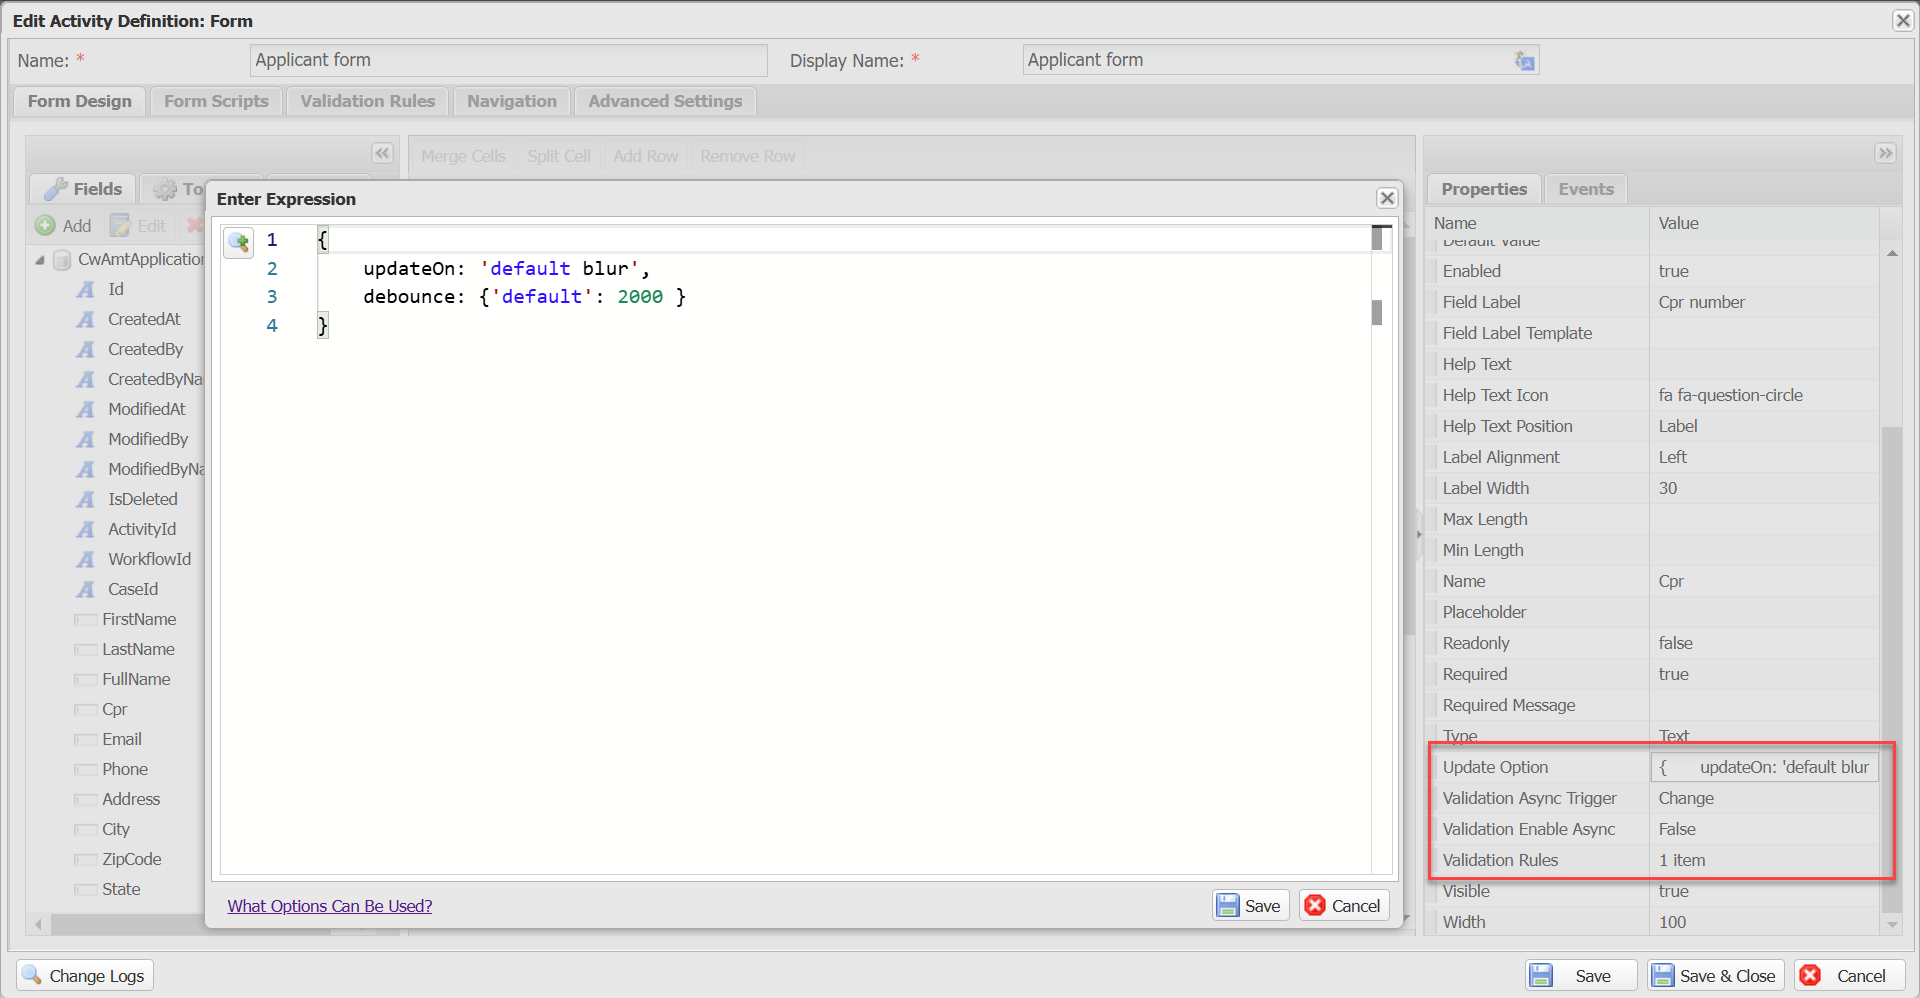
To enable instant validation, set Validation Enable Async to True and then specify a value for the property Validation Async Trigger. For example, if Blur is selected, when users focus out the component, Casewhere will immediately trigger the data validation on that component. An error message will be displayed if the validation fails, just like when submitting form data.
Please note that sending excessive validation requests while users are typing can be frustrating for end users and place unnecessary strain on the server. To address this, it's recommended to implement a debounce for value updates using the Update Option setting.