Component: Form management - Installation guide
Requirements
- Casewhere 2.6 or later
Step-by-step configuration
Form management
- Step 1. Import the product.
You can find the imported file here.
Step 2. Import the dependencies:
- Casewhere Global Settings
- Casewhere Rule Management
- Casewhere Common Component
- Casewhere Data Package:
Import the data packages of Form Management here.
Step 3. Configure the worker site components.
Navigate to Worker Site Components. In the top right of the page, you will see a Product drop-down list. Choose Casewhere Form Management.

- CwFormManagement FormIO Style Override: Customizes the style.
- CwFormManagement FormIO Loader: Loads the Form.io JavaScript.
- CwFormManagement Utilities: Helps Form.io work on CW.
- CwFormManagement Translate: Supports multiple languages.
- CwFormManagement Data Sources Custom Field: Supports configuring form data source custom fields.
- CwFormManagement Data Sources System Field: Supports configuring form data source system fields.
- CwFormManagement Form Data Sources Edit Custom Field Dialog: Supports configuring form data source custom fields.
- CwFormManagement Form Data Sources Edit System Field Dialog: Supports configuring form data source system fields.
- CwFormManagement Edit Form Button Dialog: Supports configuring form actions.
- CwFormManagement FormIO Custom Components: Customizes some Form.io components.
- CwFormManagement FormIO Readonly: Views the Form.io form in read-only mode.
We need to attach these worker site components to the worker sites where we want to use form management.
Choose a worker site component, and the edit worker site component view will appear.
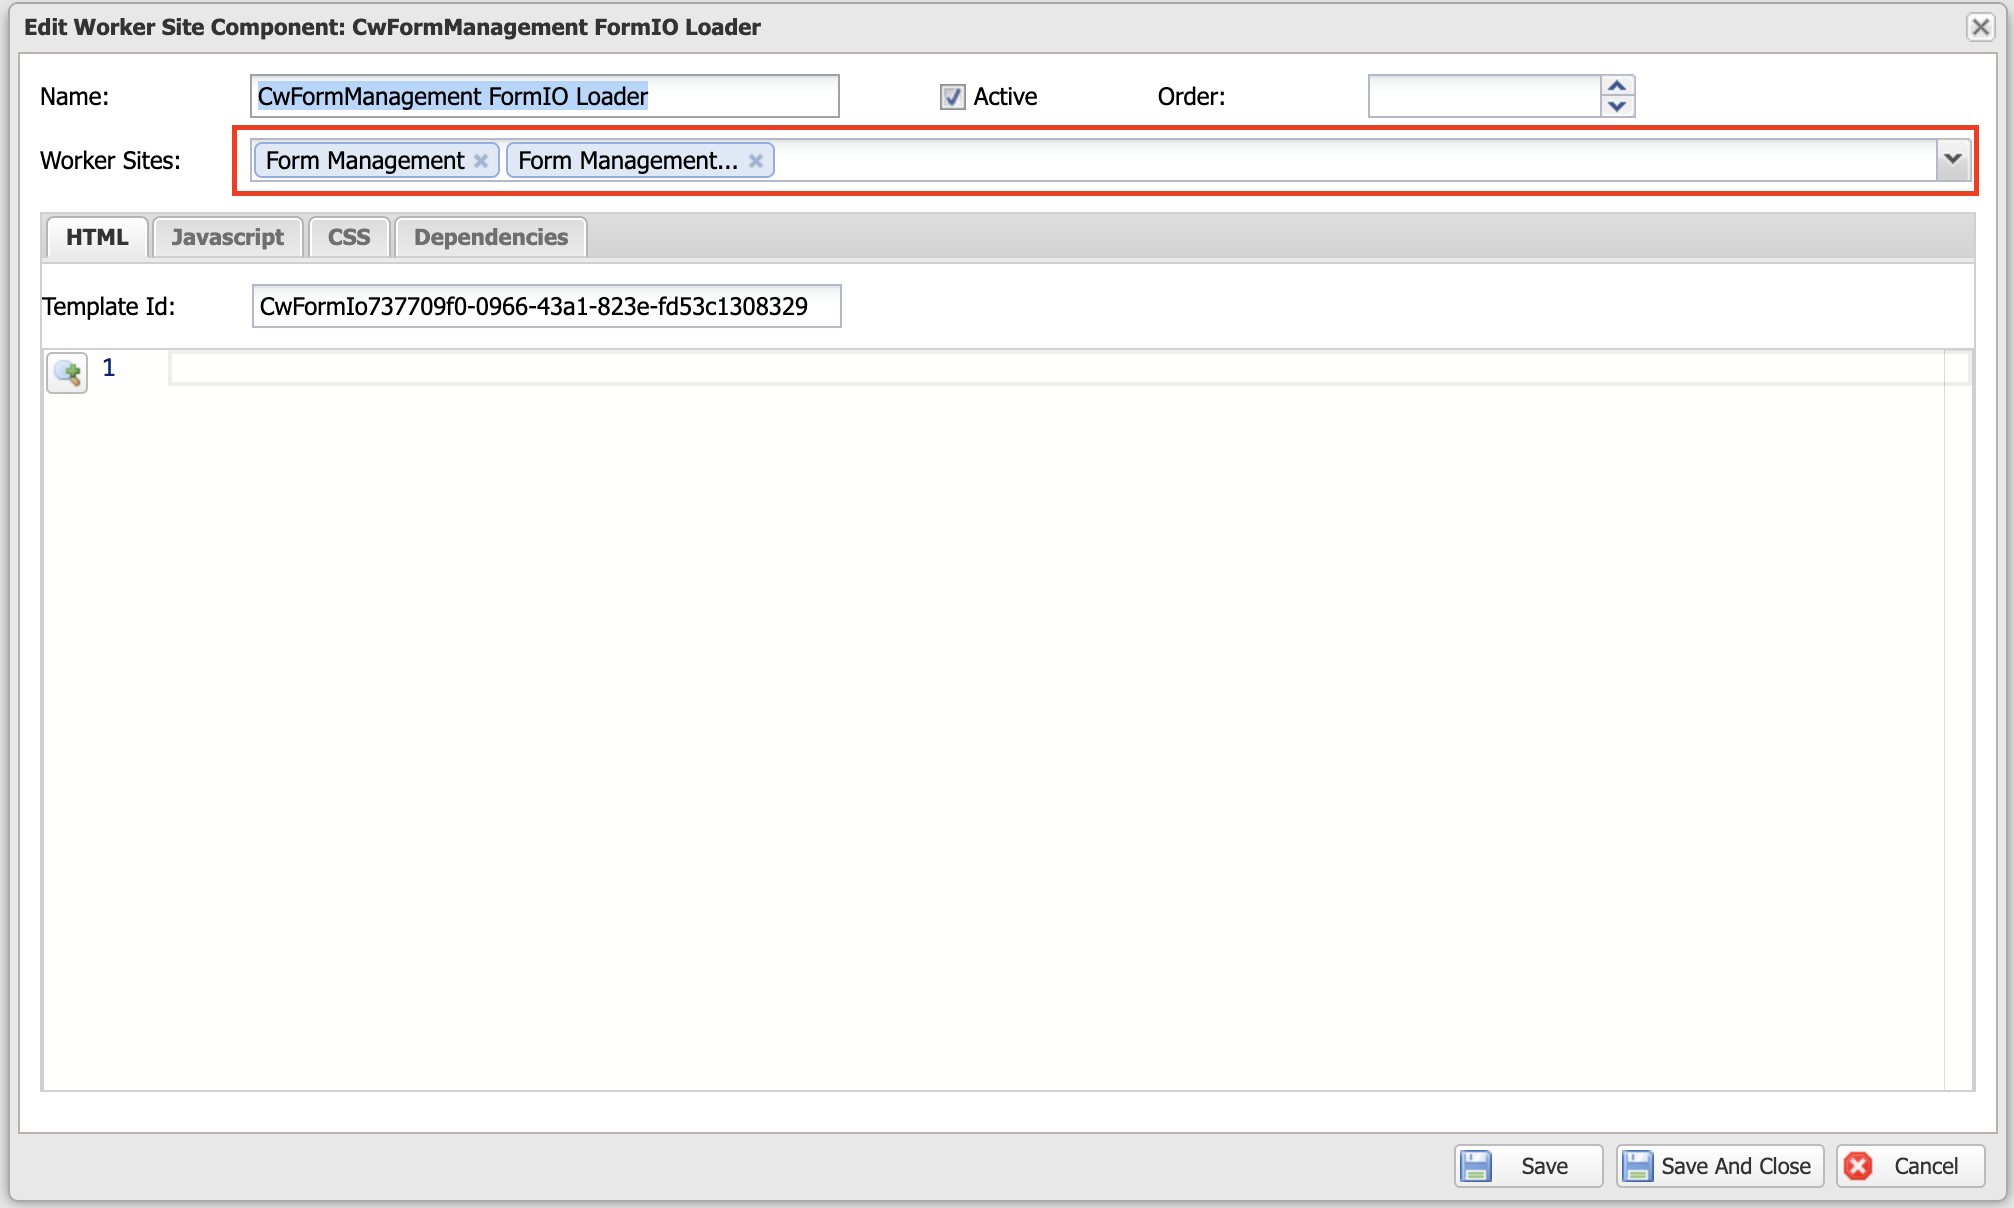
In the Worker Sites field (drop-down menu), choose the worker sites that need form management, and then click Save and Close.
Do the same with the rest of the worker site components.
- Step 4. Add pages to worker site.
Navigate to Pages.

Open the page, and you will see a configuration window like the one below. You must add the page to a worker site to make the page work.
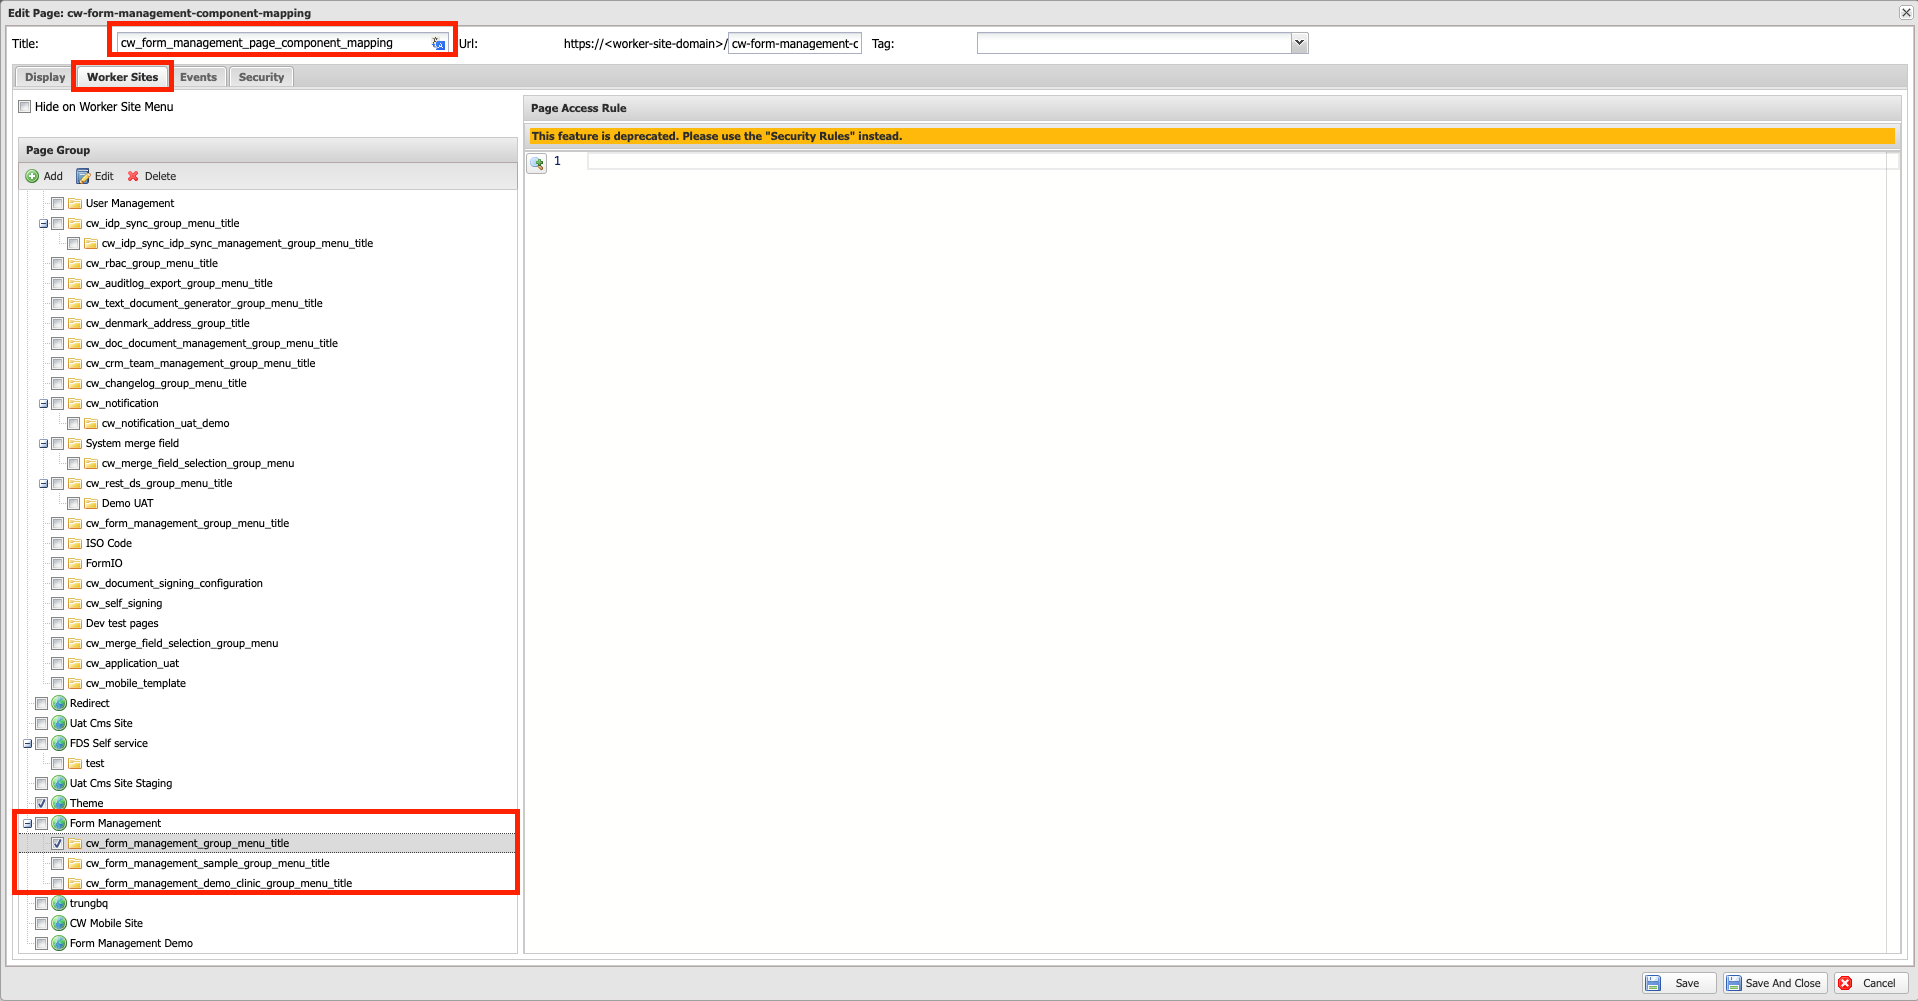
Do the same with the rest of the pages.
- Step 5. Set up CDN storage.
Navigate to Form management -> Settings, and edit CDN storage URL.

Demo
- Step 1. Import the demo product.
You can find the demo product here.
- Step 2. Import the Form data sources, the related receipt form and Depression Anxiety Stress Scales form.
Form data sources: CwFormManagementDemoMentalHealthSurvey
Forms: Depression Anxiety Stress Scales Receipt Form
Receipt forms: Depression Anxiety Stress Scales
- Step 3. Configure worker site components.
Navigate to Worker Site Components. In the top left of the page, you will see a Product drop-down list. Choose Casewhere Form Management Demo.

- CwFormManagementDemo MentalHealthPrivacyPolicyCustomDirective: Privacy policy custom component directive.
- CwFormManagementDemo MentalHealthPrivacyPolicyCustomFormIOComponent: Privacy policy custom component.
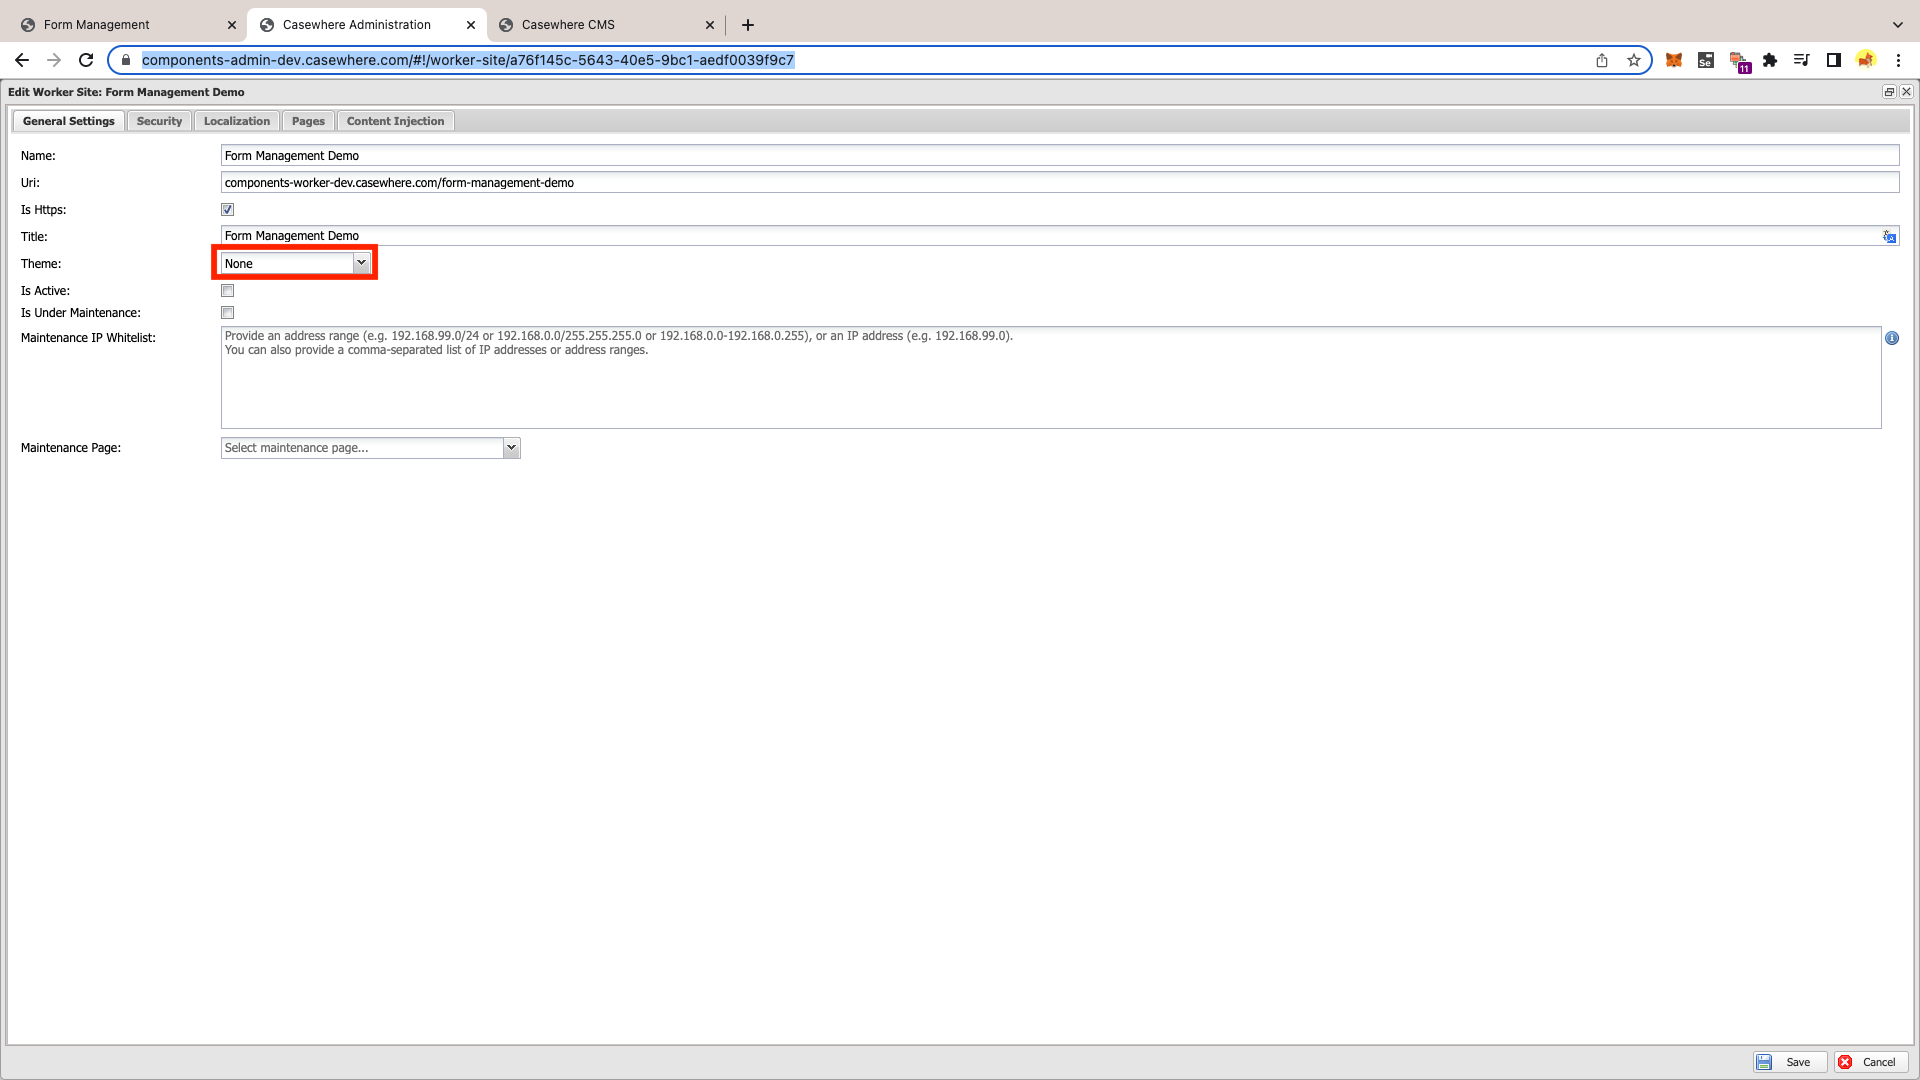
- Step 4. Create a worker site CMS admin v2.
We need to create a worker site to use the demo.
To do this, navigate to the Worker Sites tab and create a worker site with no theme.
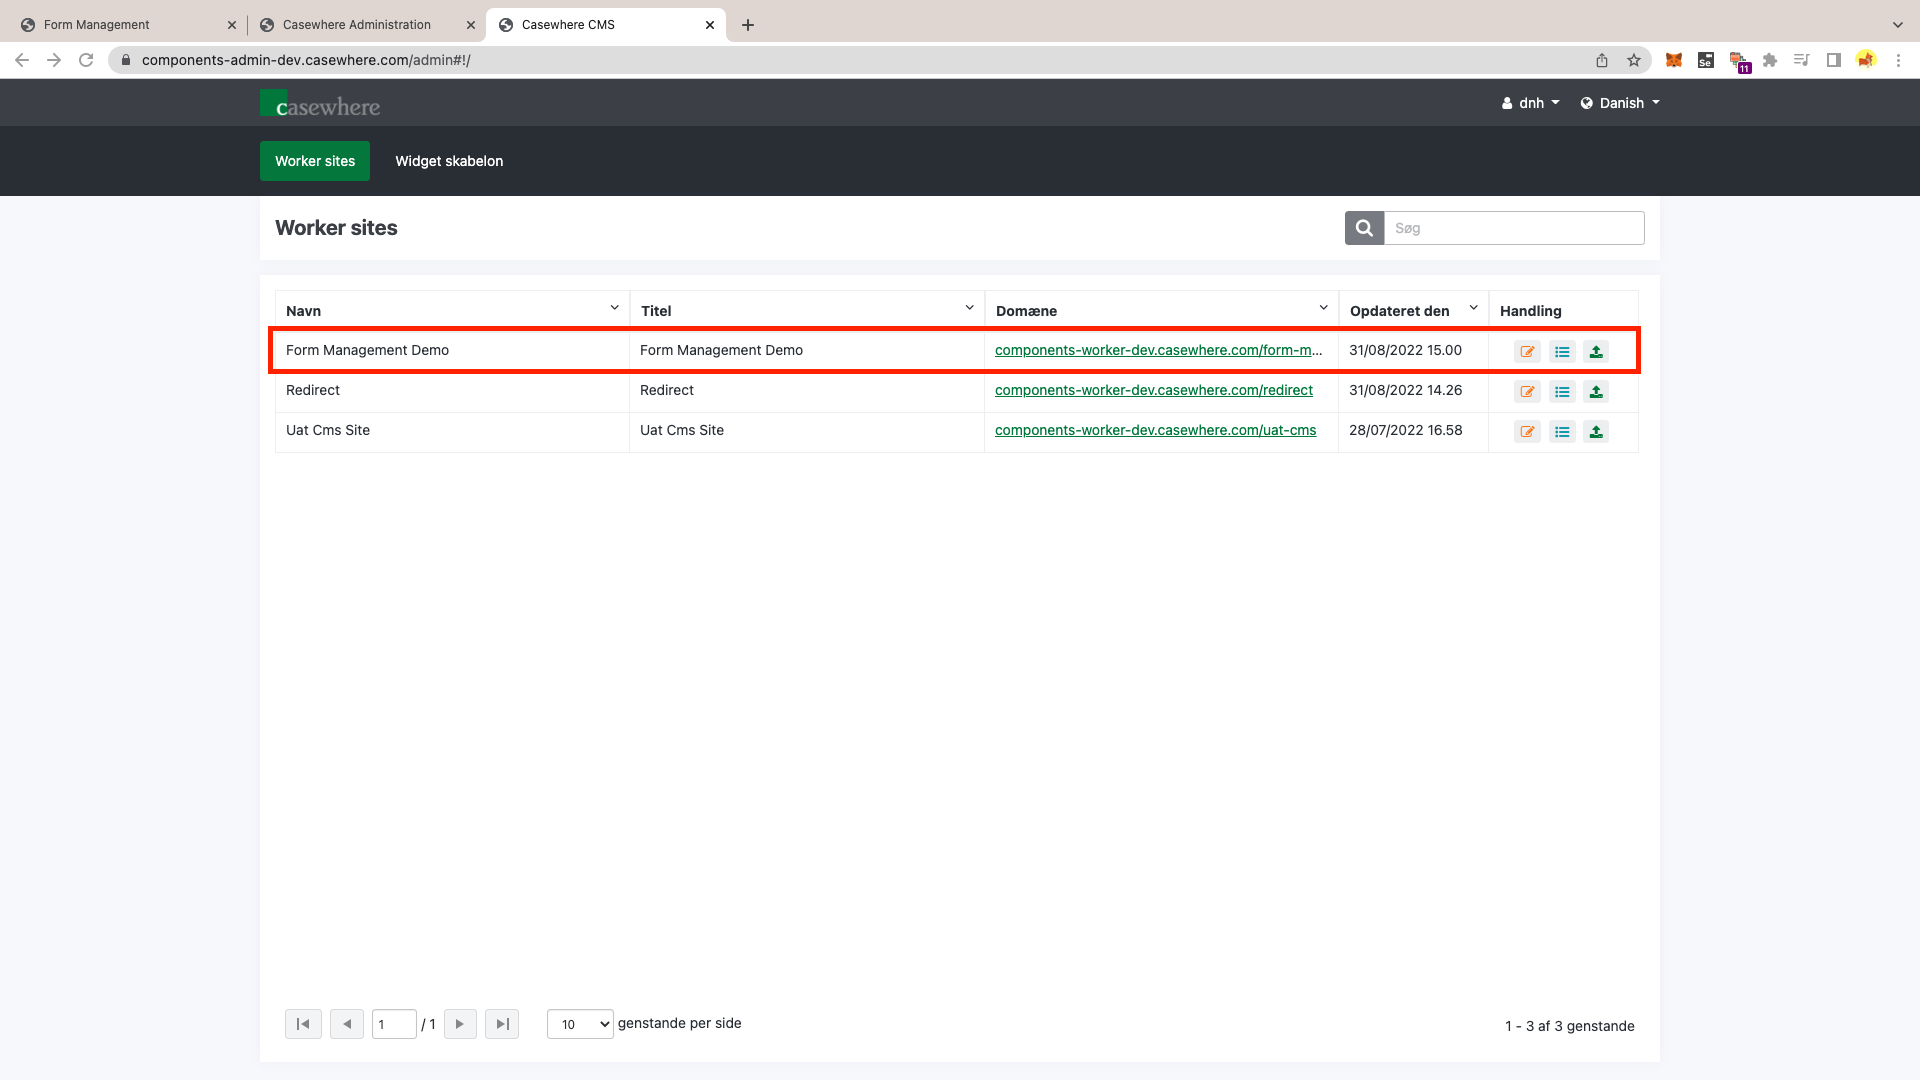
Navigate to https://your-admin-site.casewhere.com/admin, and you will see the worker site you just created.
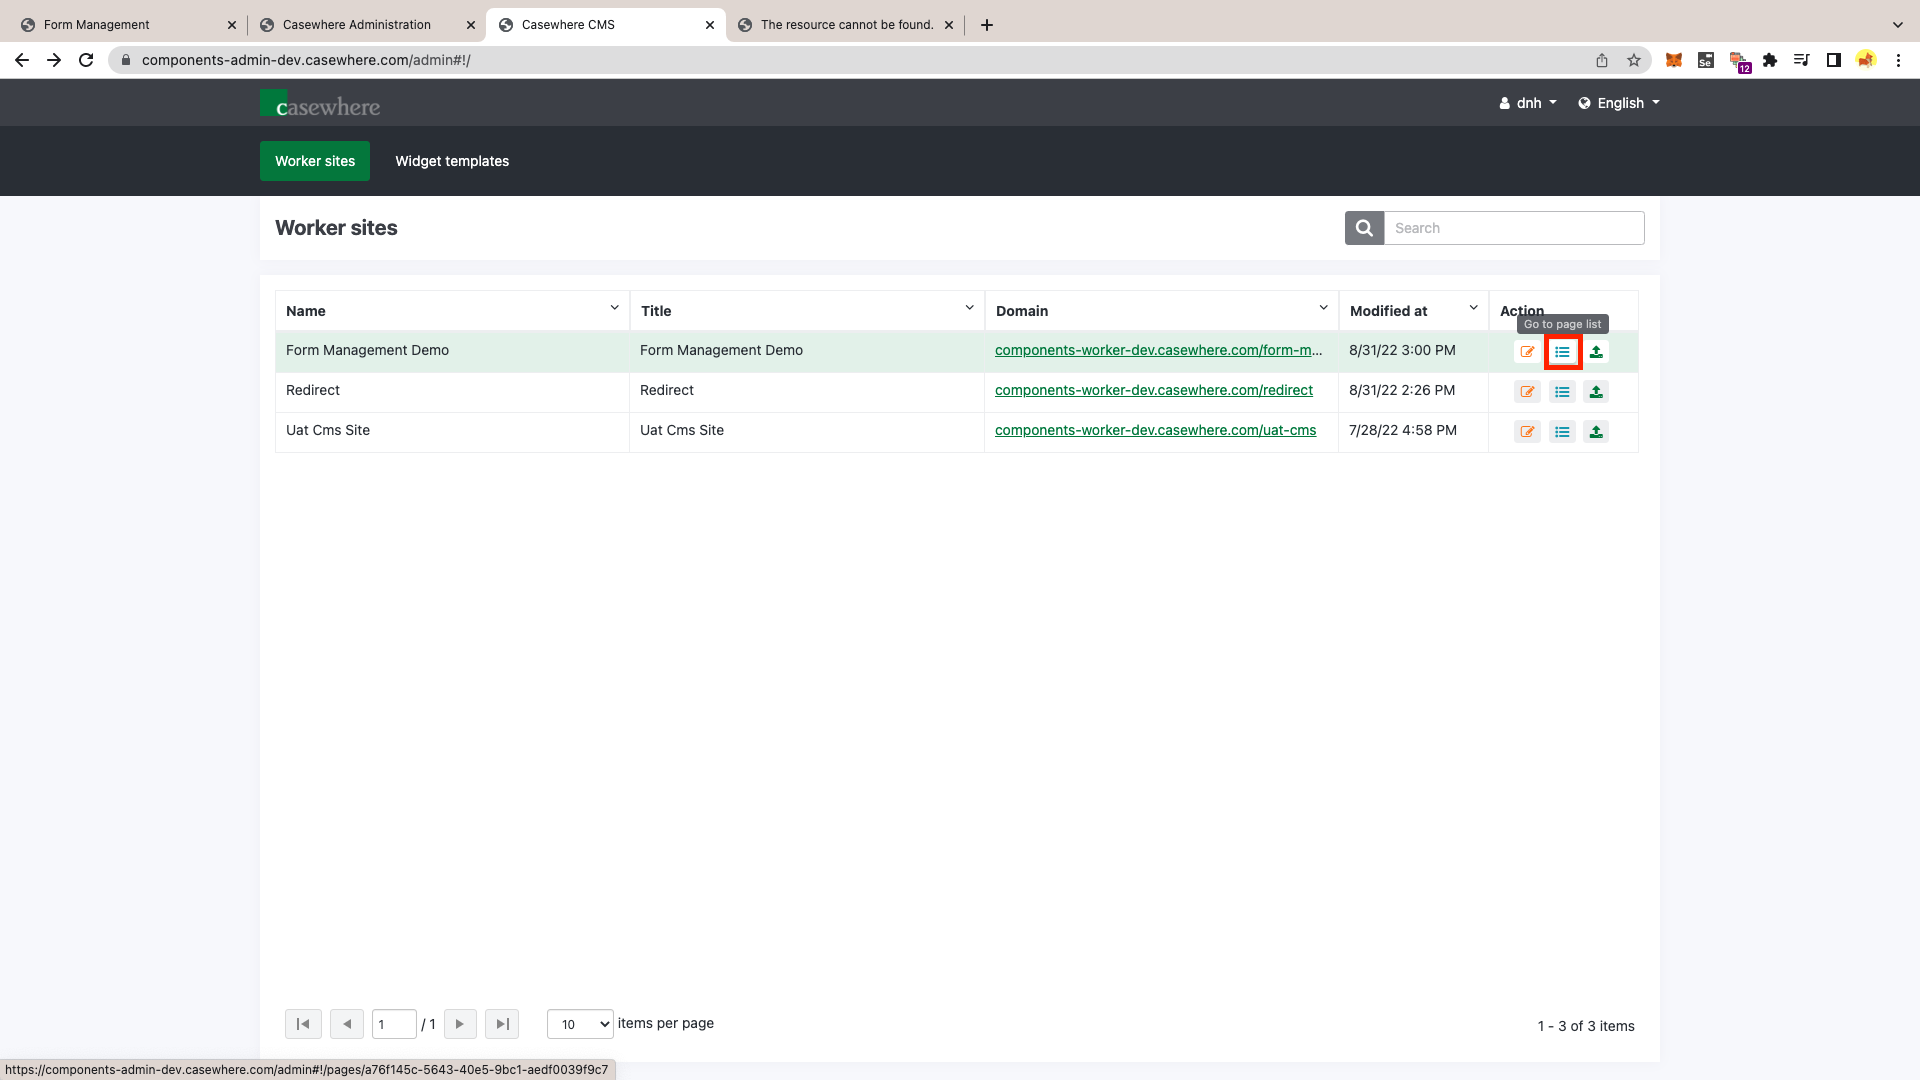
- Step 5. Add pages to CMS worker site.
Navigate to https://your-admin-site.casewhere.com/admin, and in the handling column, choose the Go to page list button.
- Step 6. Click Add page button to create a new page, and then configure the page as you want.

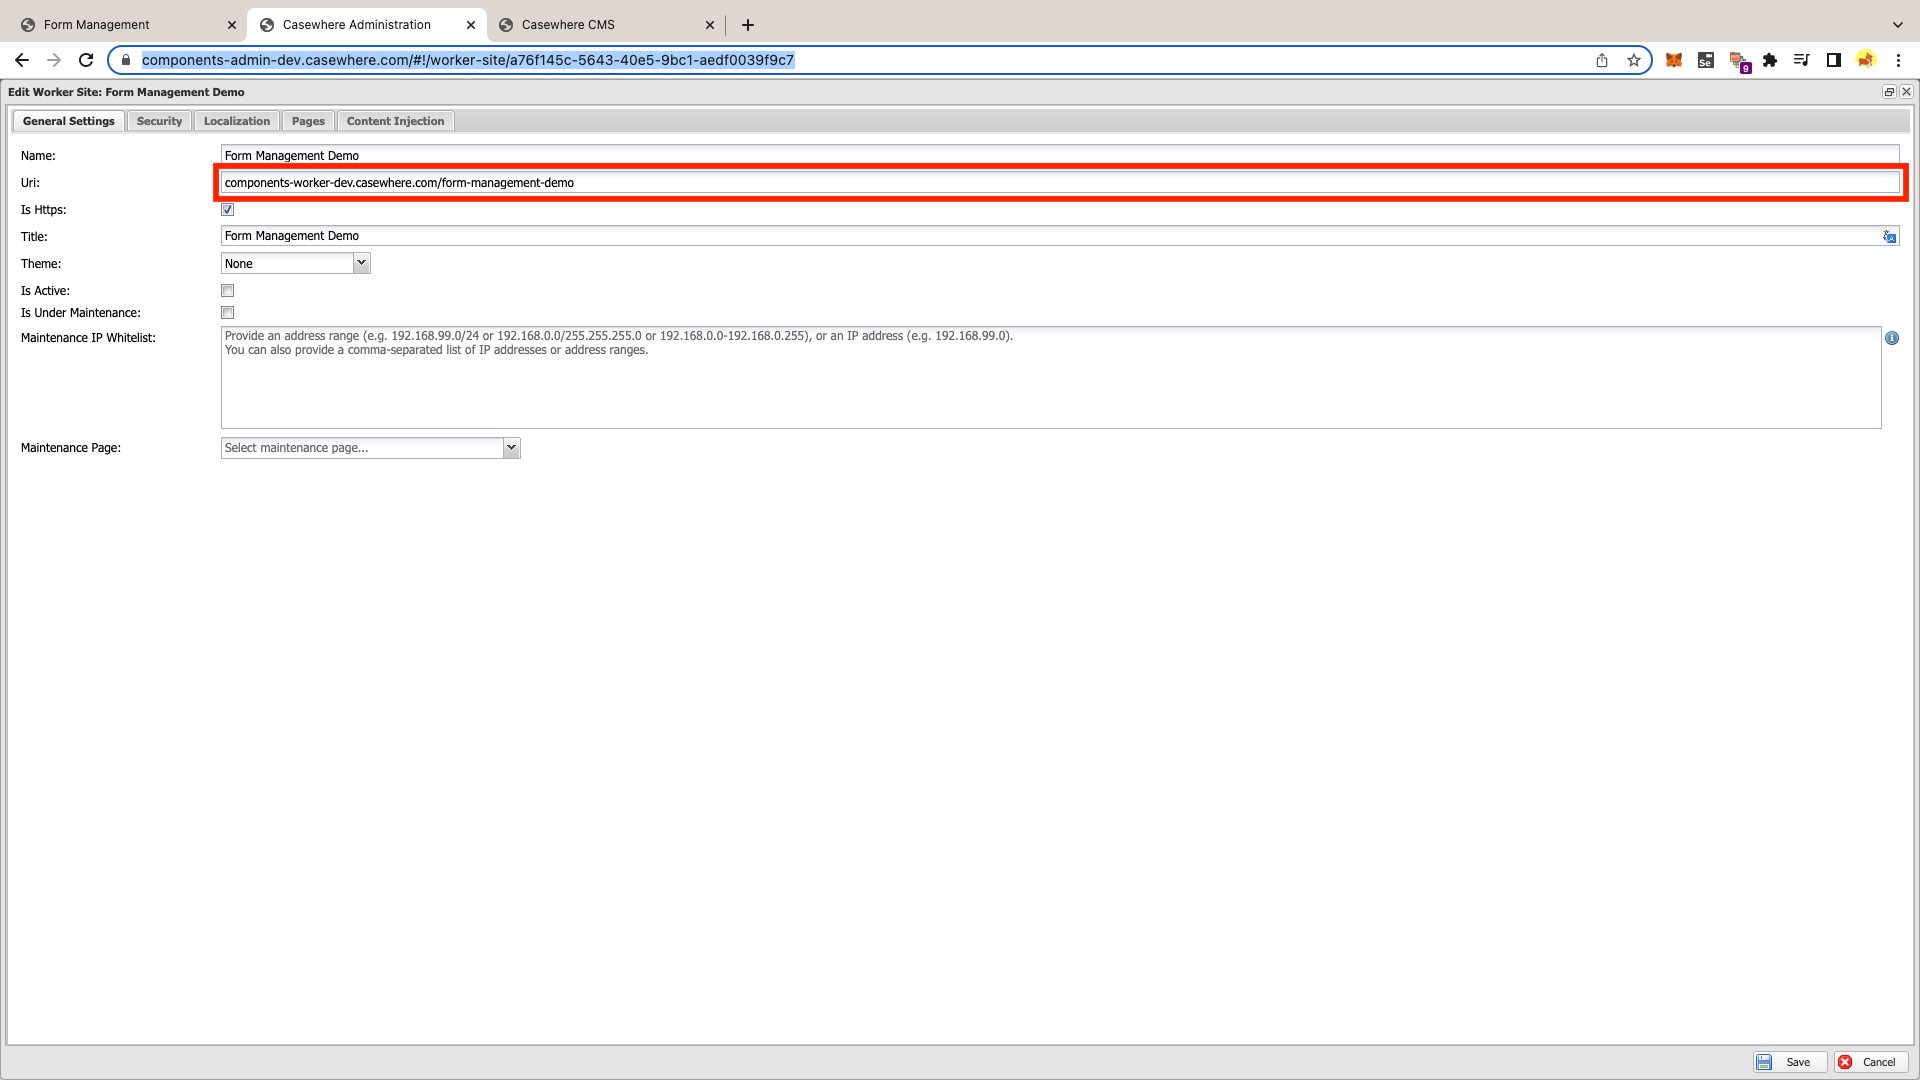
Step 7. Configure Uri of Form Management Demo worker site.
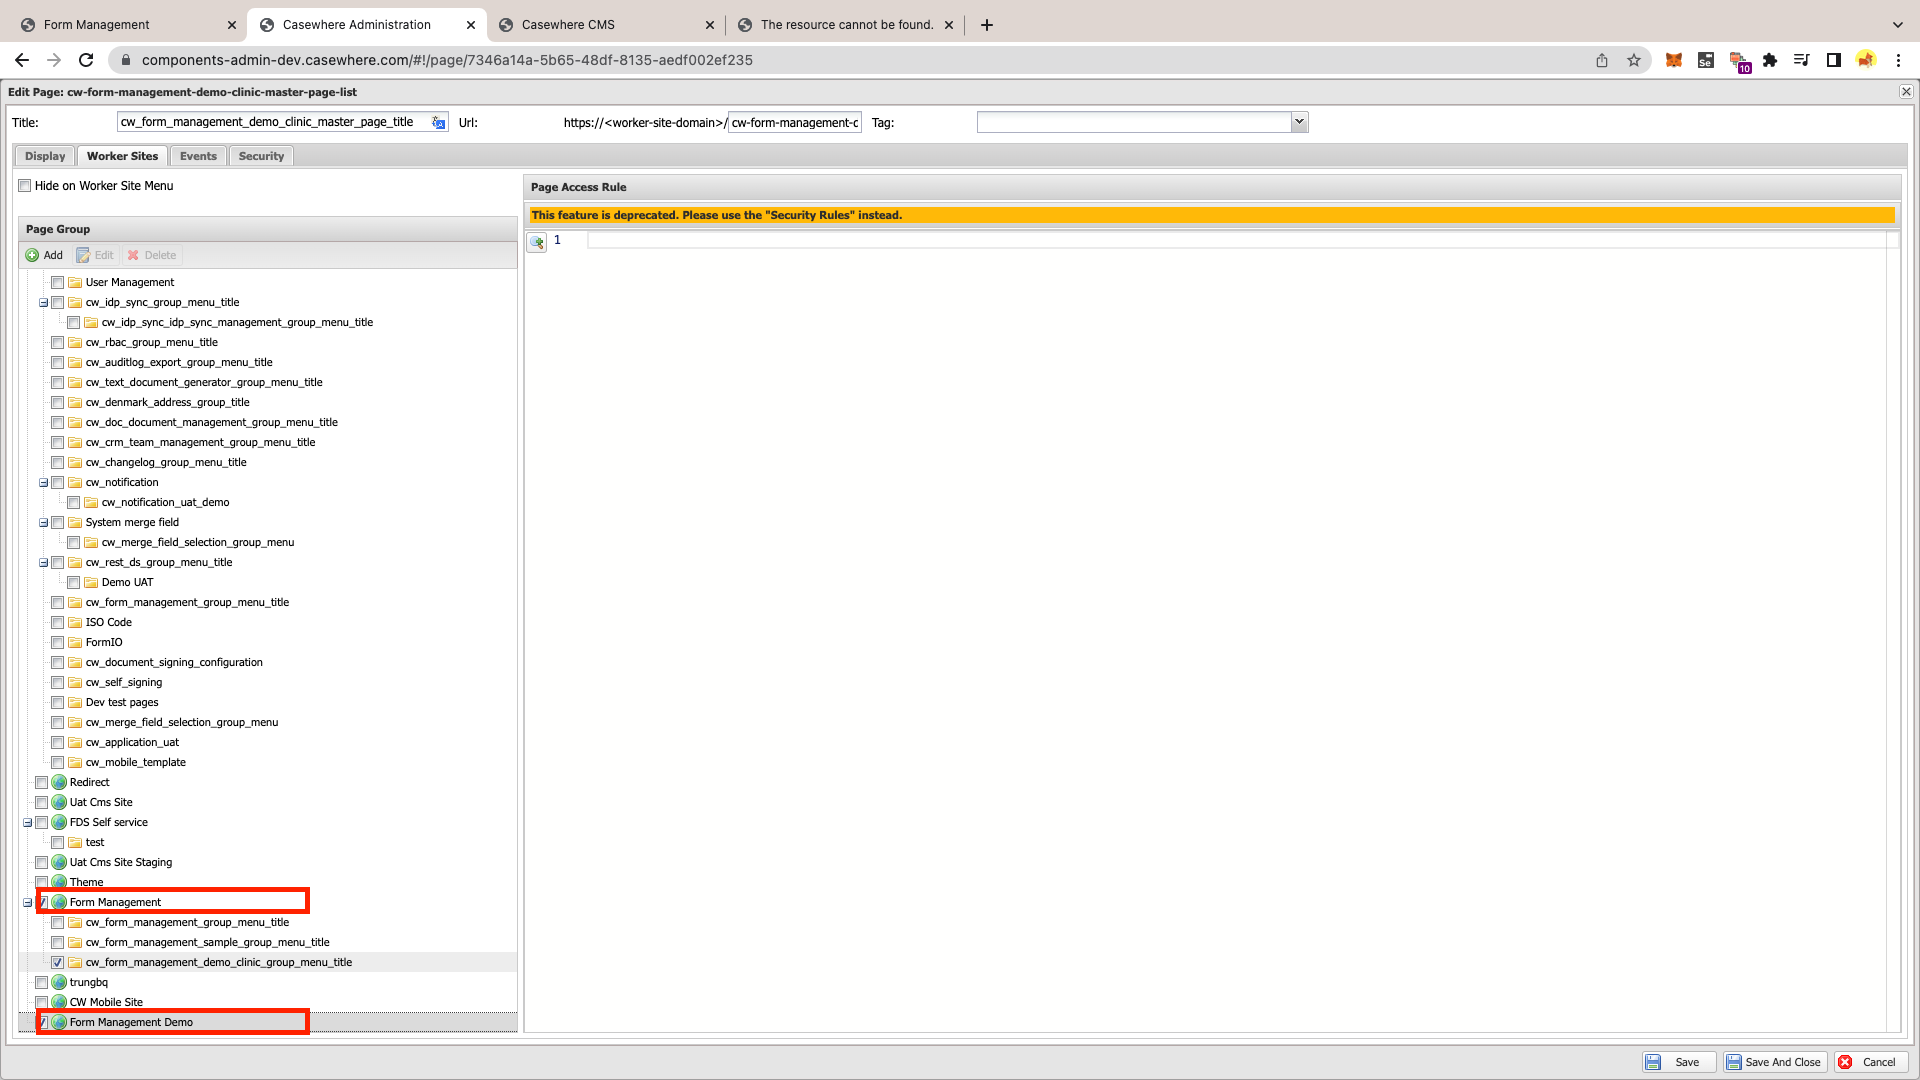
Step 8. Add all the demo pages to the worker site.
We add the demo pages to the Form Management worker site and the Form Management Demo worker site.
- Step 9. Go to your form management demo worker site and view the result.