Component: SFTP hub
Introduction
Exchanging files through an SFTP hub is an essential function in almost all Casewhere applications. The SFTP hub component is developed to simplify and standardize the process of integrating with the hub. The integrated application can easily send and receive files without interacting directly with the SSH Plugin.
Features
Manage connection info
The component provides a page to manage the server connection. The system can use a connection that was created when invoking an SSH method to interact with the SSH Plugin. If the connection info is not passed as parameters, the plugin settings are used by default.

The following information must be provided when creating a connection:
- Name: the name of the connection.
- Host: the host to connect to; can be an IP address or URL.
- Port: the port to connect to; must be a valid port number (0 - 65535).
- AuthenticationType: the type used to authenticate to a server.
- Password: to use a password.
- Certificate: to use a public/private key pair.
- Username: the username to connect with.
- Password: the password to connect with; only used when AuthenticationType is Password.
- PrivateKey: the private key to connect with; only used when AuthenticationType is Certificate. Refer to this section to learn how to generate a private key for authentication.
- Passphrase: the passphrase that protects the private key; only used when AuthenticationType is Certificate.
- RootPath: the destination path to connect to.
Manage hub folder structure
The component provides a page to manage the hub folder structure.
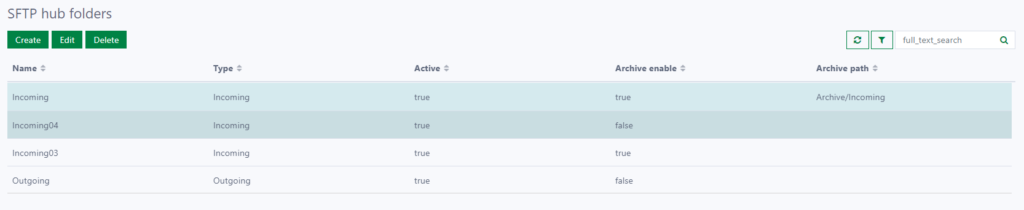
The following information must be provided when creating a folder:
- Name: the name of the folder; it should be identical to the folder name under the hub’s root path.
- Type: the type of the folder.
- Incoming: for receiving files from the hub.
- Outgoing: for sending files to the hub.
- ArchiveEnable: whether the integration is responsible for archiving files. For now, it only applies to incoming folders.
- ArchivePath: the path to the archive folder.
- ConnectionInfoId: the information used to connect to the SFTP server. Note that a folder belongs to only one server.
Receive files
The component provides the workflow CwSftpHub Receive File for receiving files, which can be used to integrate with the application’s workflow triggers. One typical scenario is using a scheduler to periodically scan the incoming folders and download any files. A CwSftpHubIncomingFile object is created if a file is downloaded successfully. If ArchiveEnable=true, the component automatically archives the file by moving it to the specified folder in the hub.
Below is the data structure of the CwSftpHubIncomingFile:
- FileName: the file name.
- FolderId: the configured Incoming folder.
- Content: the file content.
- Status:
- Received: when the file is downloaded successfully.
- Archived: when the file is moved to the archive folder.
- RelatedEntityId: optional; refers to an application’s Entity Id.
- SyncDate: the time when the file is downloaded (in UTC+0 format).
- HubCreatedDate: the time the file was created in the hub (in UTC+0 format).
Send files
The application can send a file to the hub by creating a CwSftpHubOutgoingFile object. The application can choose to send either synchronously or asynchronously by turning the IsAsync attribute on or off. The component then automatically sends the file to the hub through a built-in data trigger. In addition, the component retries sending the file a number of times if it fails to send for some reason.
Below is the data structure of the CwSftpHubIncomingFile:
- FileName: the file name.
- FolderId: the configured Outgoing folder.
- Content: the file content.
- Status:
- Created: the data object is created.
- Ready: ready to send.
- SentSuccess: the file is sent successfully.
- SentFailed: the file failed to send.
- RelatedEntityId: optional; refers to an application’s Entity Id.
- SyncAttempts: the number of upload attempts that have been triggered.
- MaxSyncAttempts: the maximum number of retries if sending the file fails.
- IsAsync: upload immediately or wait in the queue.
Manage connection
The application allows the user to manage the connections.
The following information must be provided when creating a connection:
- Name: the name of the connection.
- Host: the host to connect to; it can be an IP address or URL.
- Port: the port to connect to; a valid port number should be in the range (0 - 65535).
- AuthenticationType: the type used to authenticate the connection.
- Password: using a password.
- Certificate: using a public/private key pair.
- Username: the username to connect with.
- Password: the password to connect with; used when AuthenticationType is Password.
- PrivateKey: the private key to connect with; used when AuthenticationType is Certificate.
- Passphrase: the passphrase that protects the private key; used when AuthenticationType is Certificate.
- RootPath: the destination path to connect to.
Installation
Requirements
- Casewhere 2.6.0 or later.
Configure SSH Plugin
Get private key from a .ppk file.
Download and install PuTTY.
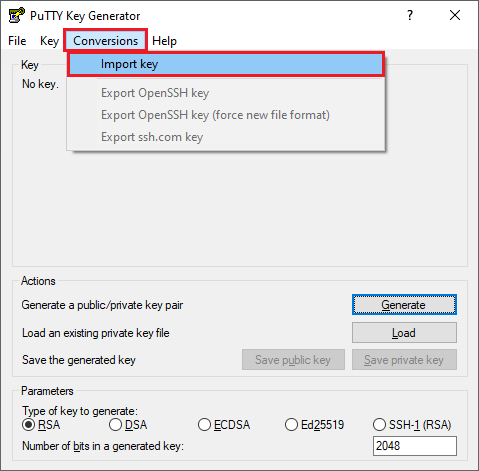
Follow the instructions on this page: https://www.ssh.com/ssh/putty/windows/install to download and install PuTTY.Convert the .ppk file to a private key file. After installing PuTTY, run the PuTTYgen application and follow the steps below to get and install a private key:
Go to Conversions menu and select Import key
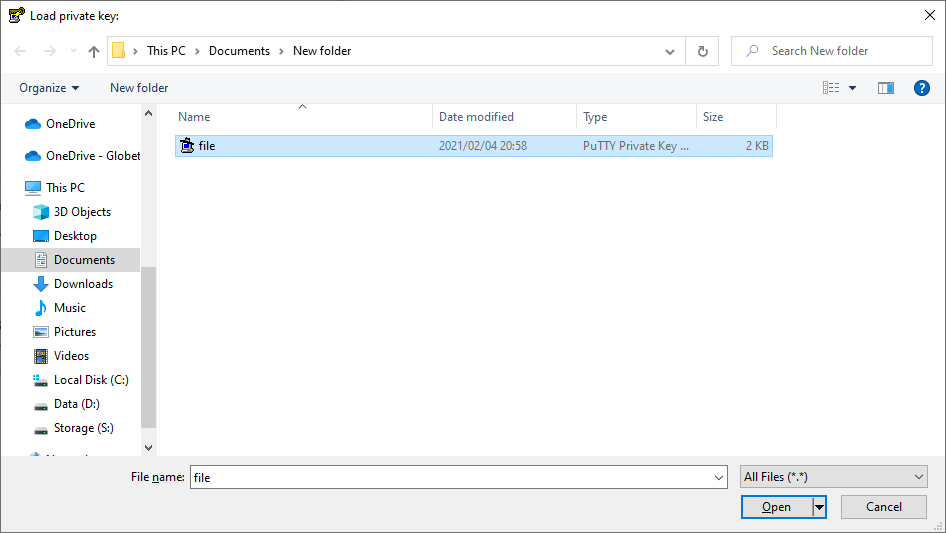
Select the .ppk file and click Open
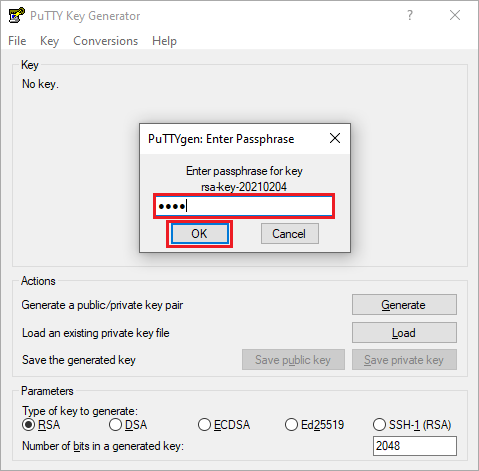
Enter the passphrase that protects the key in the .ppk file
Go to Conversions menu and select Export OpenSSH key
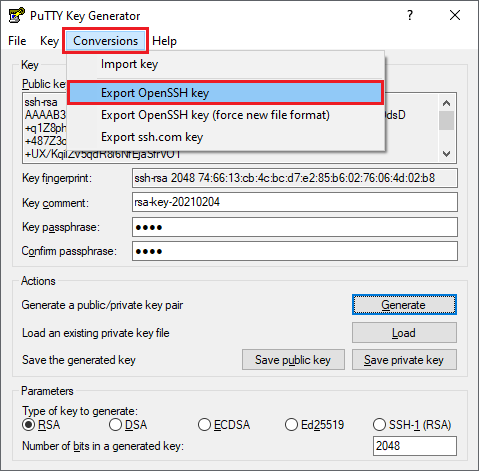
Select a location to export the private key file and enter the desired name for the file

Configure the application
After installing, users must configure the application as below:
{
  "Host": // Host IP,
  "Port": //Port,
  "Username": //Username to access the host,
  "Password": //Password,
  "RootPath": //Path to the root folder
}
Releases
1.1.0 - 24/01/2022
Changelog
- Manage SFTP connection.
- Support connection parameters.
- Support connect by private / public key pairs.
Download (login required): SFTP hub v1.1.0
1.0.0 - 19/07/2021
Changelog
- Manage hub folder structure
- Receive files
- Send files
Download (login required): SFTP hub v1.0.0