Build the caseworker site
Introduction
Caseworkers need one page: Applications, a list of all applications with an Approve and a Reject button. The buttons must work only on applications that wait for a decision, so a caseworker cannot decide twice.
Create the grid widget
Check that Grant Applications is selected in the product selector.
Open Widgets, click Create and choose Grid View. In Title, type
Applicationsand click Save.Open Data and choose the Data Source
GaApplication. Keep Query Type BsonDocument and the query Casewhere suggests: it lists the records of all open cases, which is every application.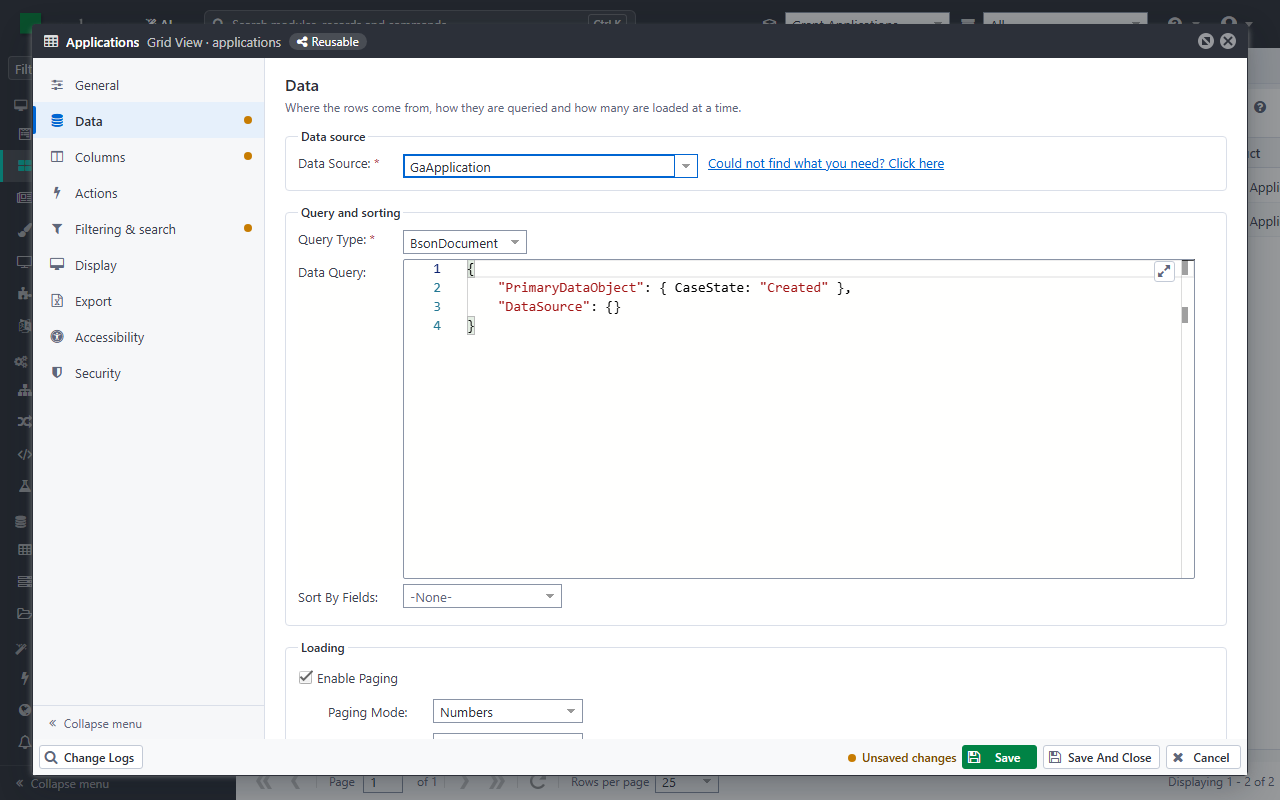
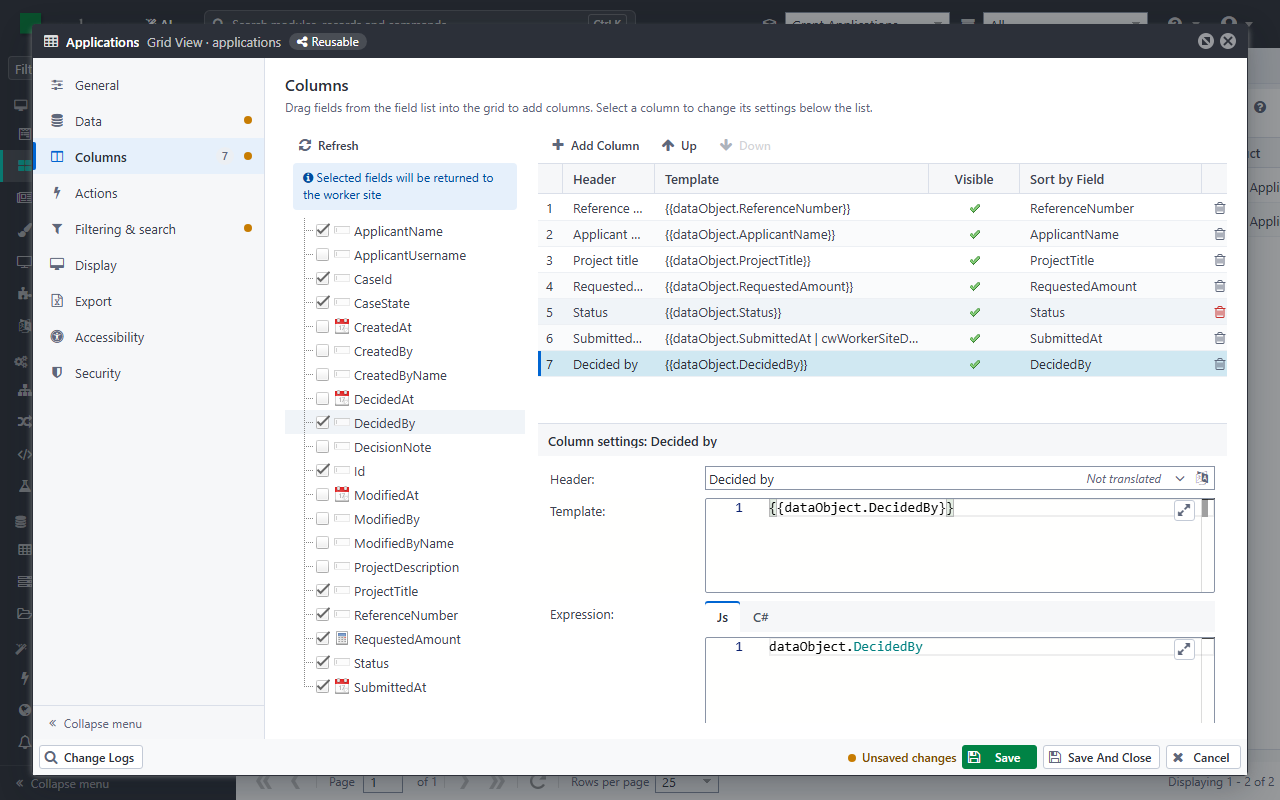
Open Columns and drag ReferenceNumber, ApplicantName, ProjectTitle, RequestedAmount, Status, SubmittedAt and DecidedBy into the column list.
Add the Approve and Reject buttons
Open Actions, click Add and choose Trigger a Workflow. Fill in General:
Field Value Name approve Label Approve Workflow Definition Ga Approve Application Force Reload Data ☑ There is no Process field this time: the workflow works on an application that already has its case.
Open the action's Advanced tab and fill in Client Enable Rule:
model.selectedDOs[0].Status == 'Submitted'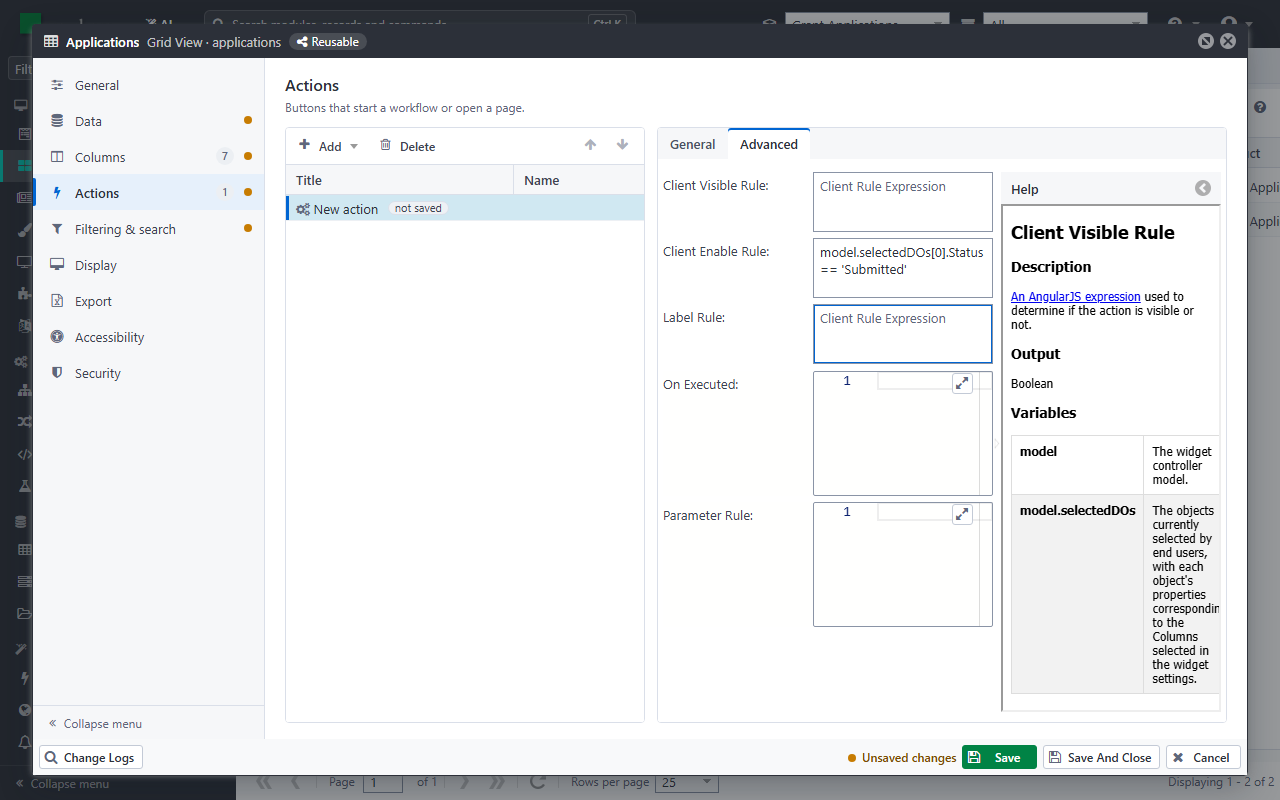
Casewhere already enables the button only when a row is selected, because the workflow requires an input. The rule adds a condition of yours:
model.selectedDOsholds the selected rows, so the button is enabled only for an application whose status is Submitted.Click Save. An action is saved with the widget, and must be saved before you add the next one.
Add the Reject button the same way: Name
reject, LabelReject, Workflow DefinitionGa Reject Applicationand the same rule.Click Save And Close.
Important
A client rule only changes the browser's buttons. Rules that protect data must also run on the server: for example, the decision workflows can check the status in a script, and an access rule on the workflows can let only caseworkers run them.
Create the page
Open Pages, click Create, and fill in Title
Applicationsand Urlapplications.Open Layout, choose Widget Gallery and drag Applications onto the layout. Keep Use shared instance and click Add.
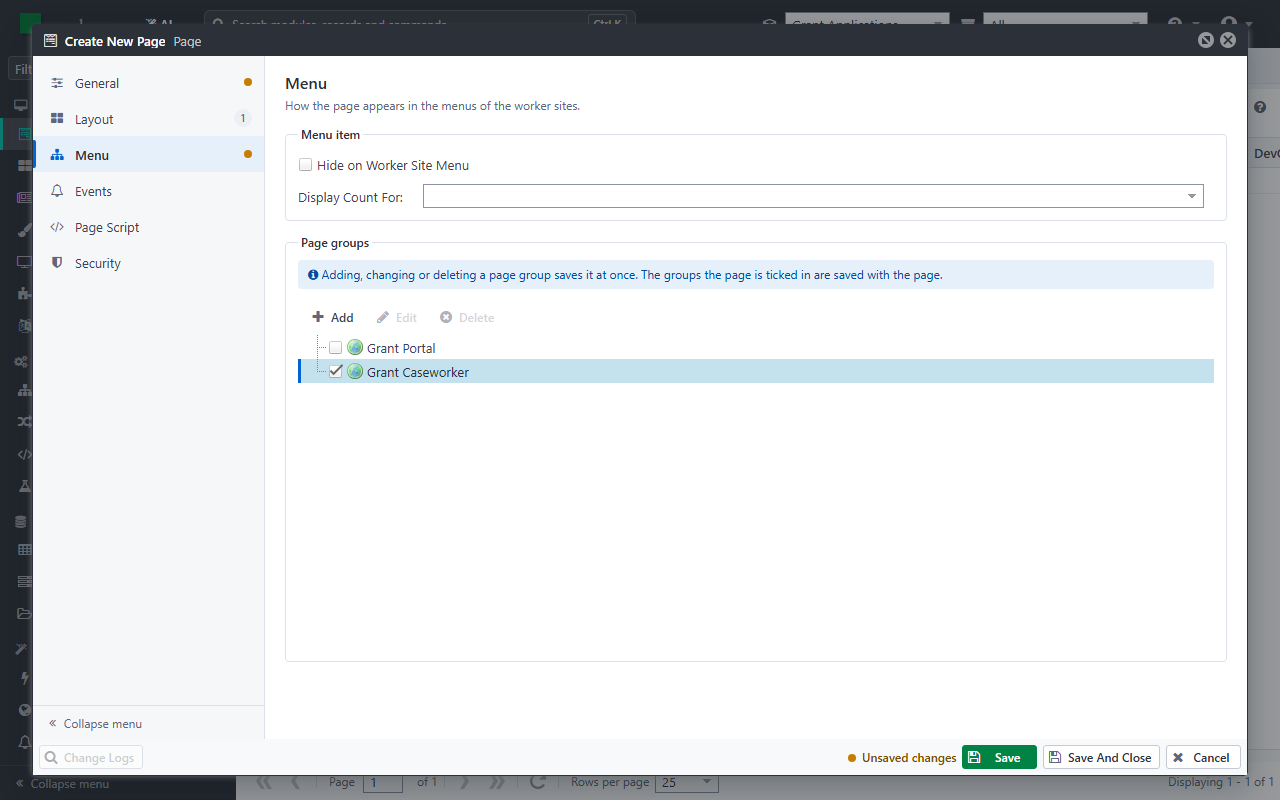
Open Menu and tick Grant Caseworker.
Click Save And Close.
Next: Try it end to end.