Working with Casewhere DevOps
This article will explain how Casewhere DevOps works in practice and highlight some best practices to consider. For creating DevOps packages, read here for more information.
Add/remove items
Since Casewhere 2.8.7, you can find the DevOps menu in all management pages under Casewhere Admin.
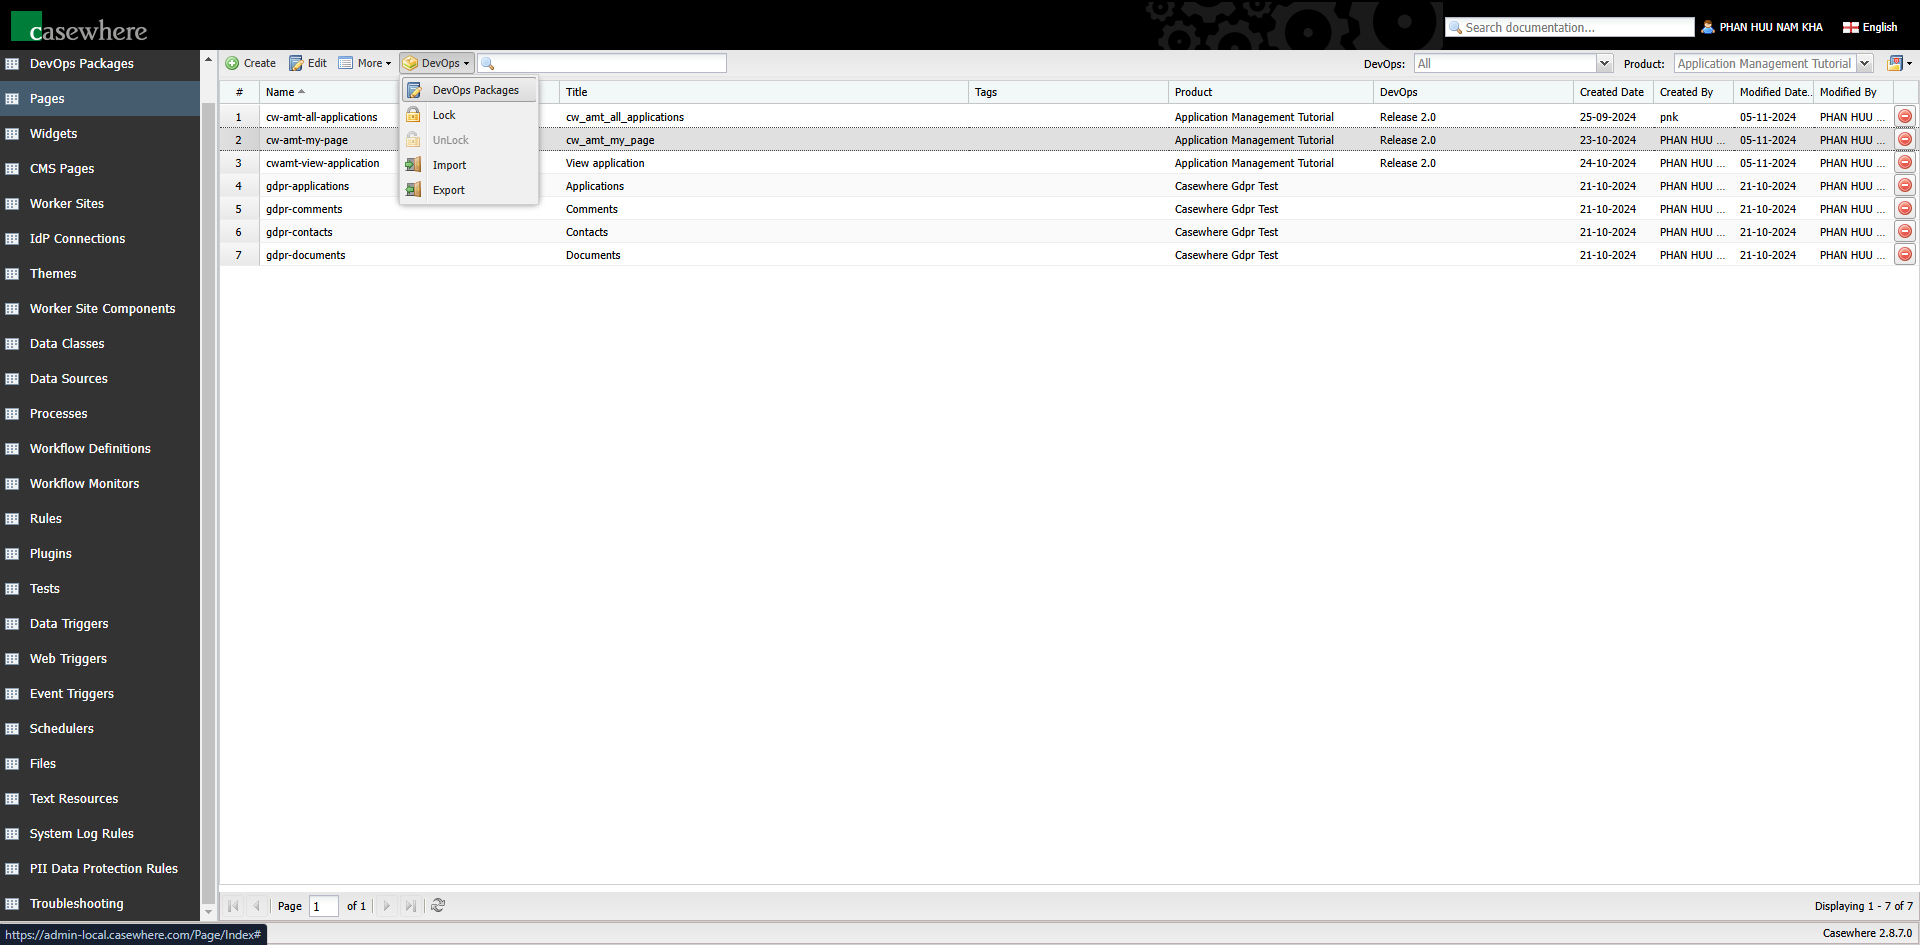
To add items to DevOps packages, simply select one or more resource items and click DevOps / DevOps Packages. A dialog will appear, allowing you to select the DevOps packages to which you want to add the items.
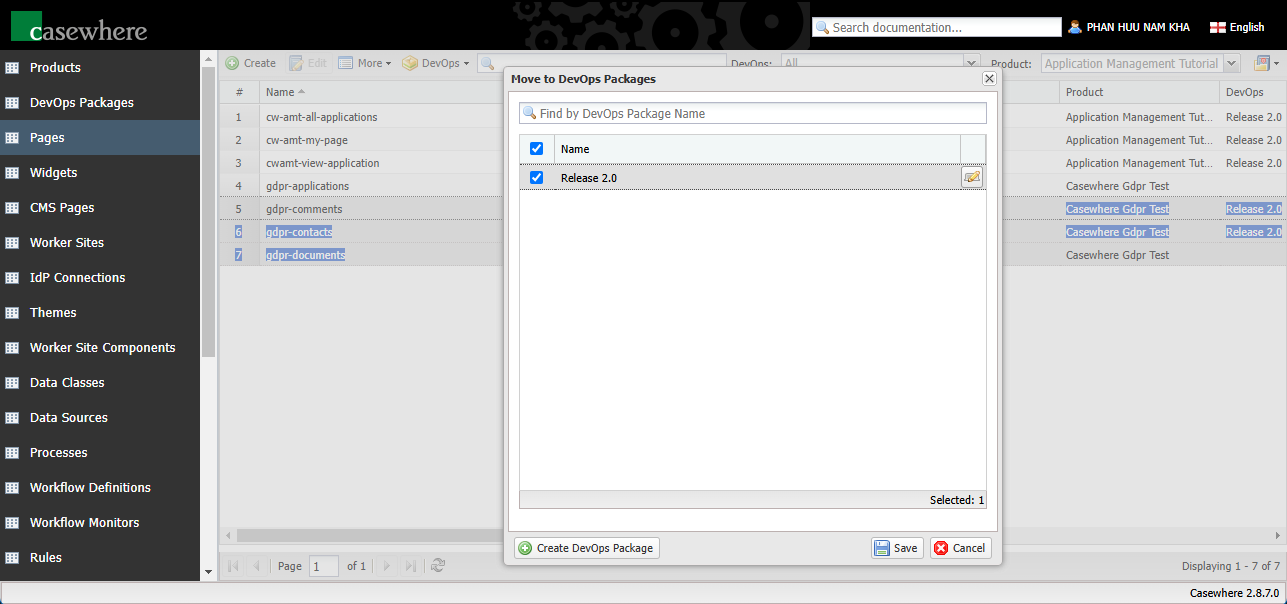
Please note that only active DevOps packages are available for selection. After you click Save, all DevOps packages associated with the resource item will appear in the DevOps column on the page.
Lock a DevOps package
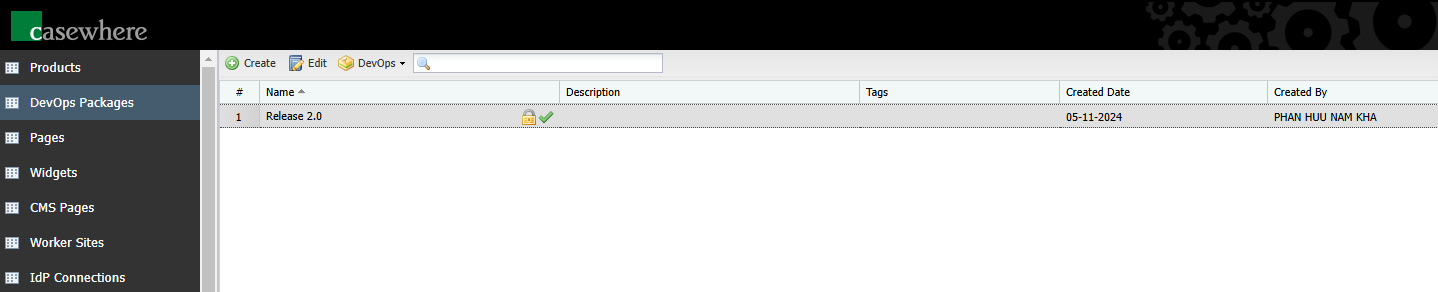
Once you have completed a release and are preparing for production deployment, it is a good practice to freeze the package while it is under user acceptance testing to prevent unwanted modifications. To freeze a package, navigate to "DevOps Packages" to edit it. In the editor dialog, check Is Locked, and finally click Save.
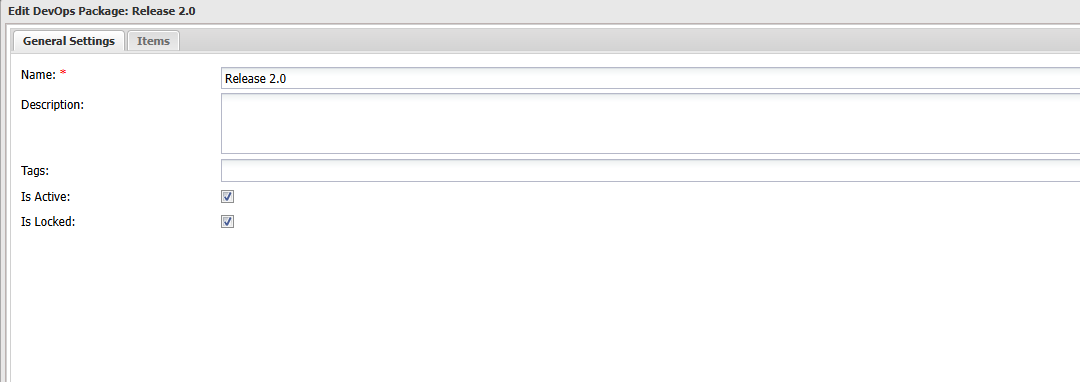
You will notice a "lock" icon appearing for locked packages.
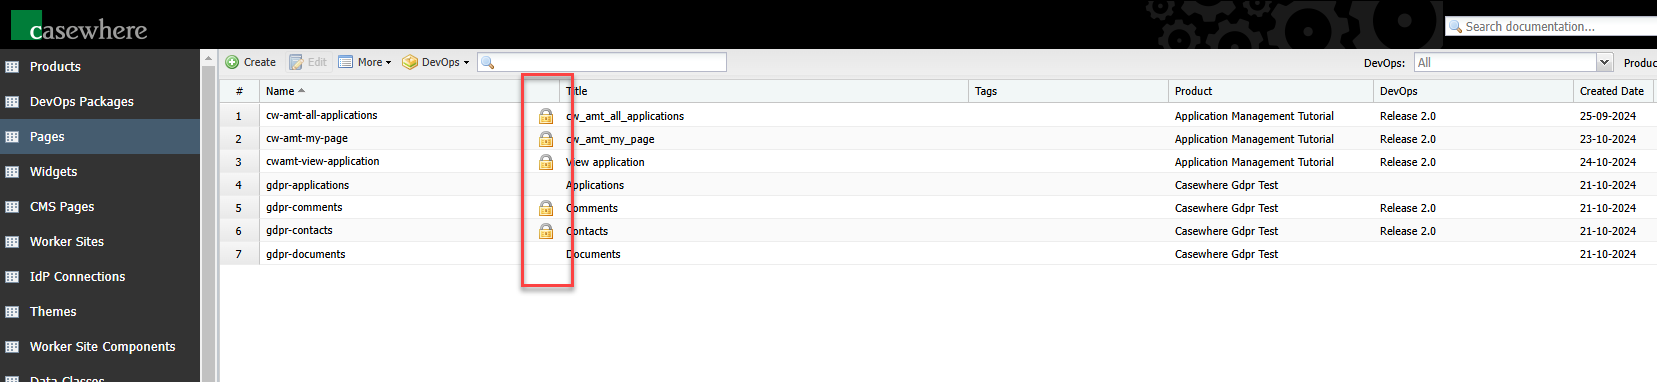
Once a package is locked, all resource items associated with it will also be locked from modification.
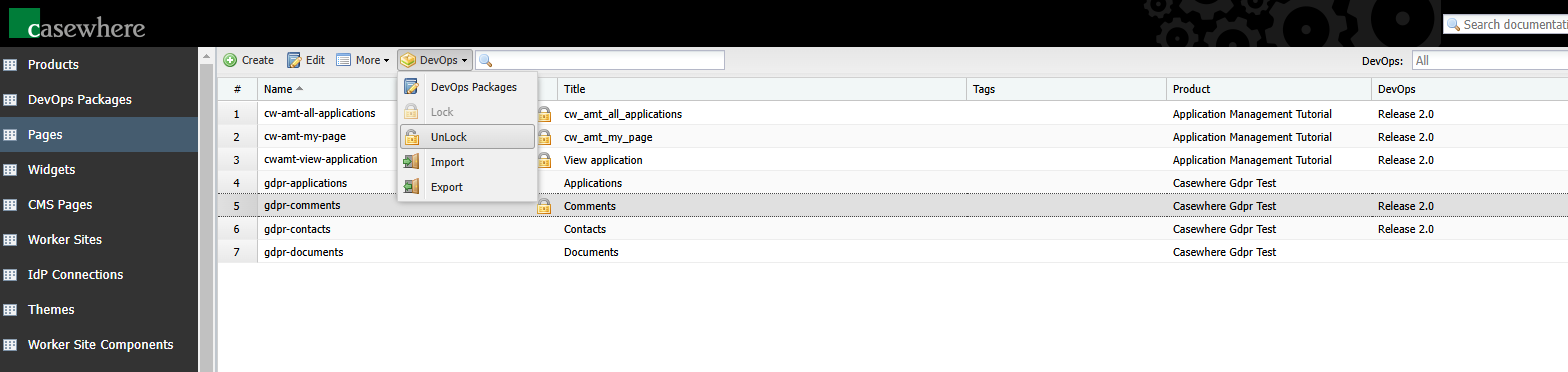
Even when the package is locked, you can still Lock or Unlock individual resource items. This can be useful when managing multiple releases simultaneously.
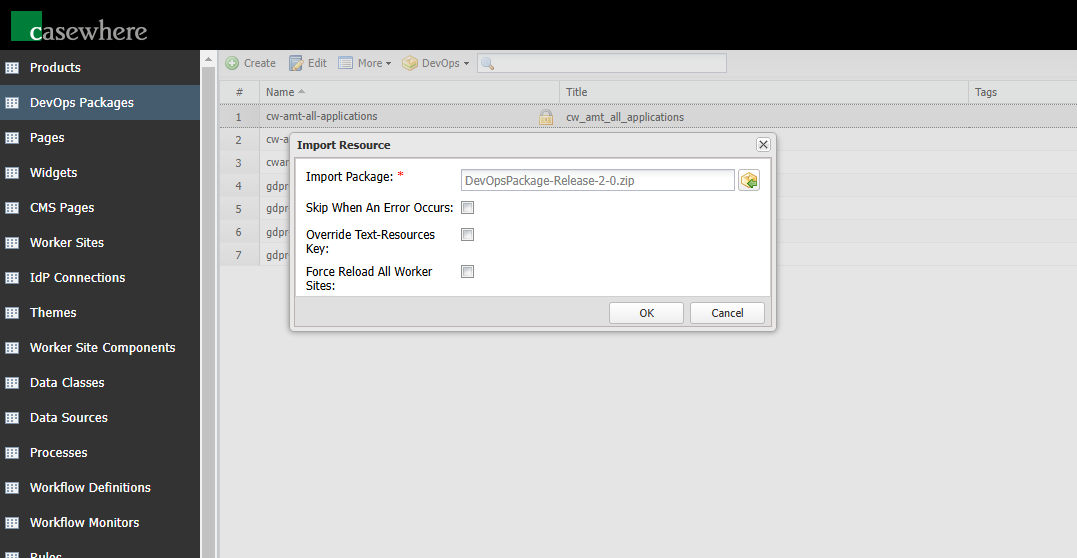
Import/export DevOps packages
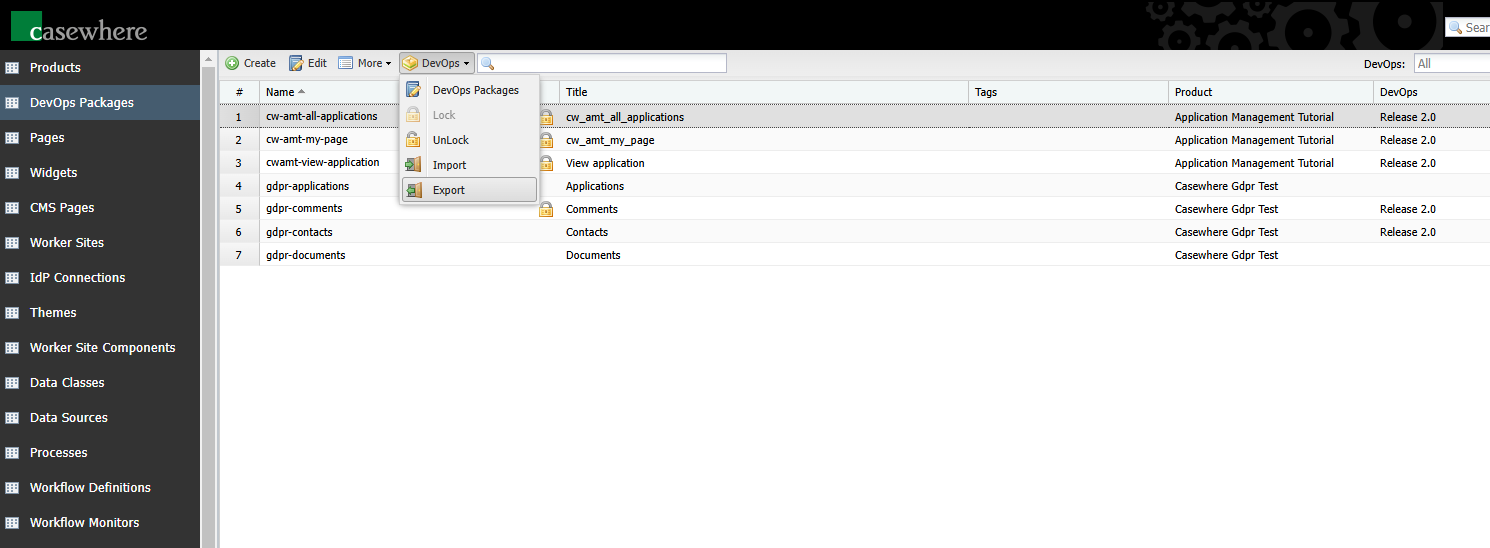
In Casewhere Admin, import and export functionalities can be accessed from the DevOps Packages page. To export a DevOps package, select a package and click DevOps / Export.
To import a package, use DevOps / Import. The import options are similar to those for importing products.