Deploy Casewhere on-premise
1. Diagram
A typical enterprise deployment can look as follows.
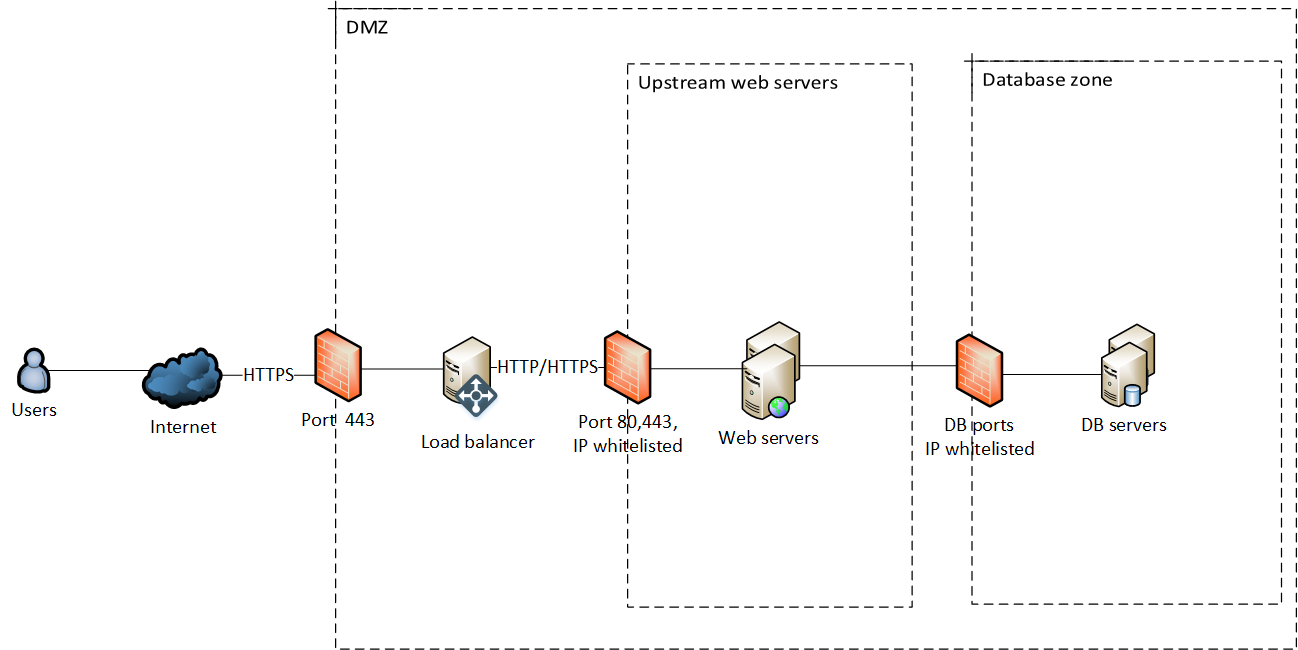
Please note that setting up the network infrastructure is beyond the scope of this document.
2. Prerequisites
Minimum requirements for Dev and Test
- Web server: 2 cores, RAM, 4 GB
- Database server: 2 cores, RAM 8 GB
- Windows Server 2016 or later
Minimum requirements for Production
- Web server: 2 cores, RAM 8 GB
- Database server: 2 cores, RAM 8 GB, SSD
- Windows Server 2022 or later
Software
The following must be installed before setting up Casewhere:
- ASP.NET 4.5 and Microsoft .NET Framework 4.8 runtime.
- Install Microsoft Visual C++ Redistributable latest version. Restarting the server is required.
- Casewhere 2.8 or later.
- Prepare the service certificates described here.
3. Deploy MongoDB Replica set
MongoDB recommends using a replica set for production workloads. You can follow the guidelines here to install MongoDB and configure the replica set for Casewhere.
For development and testing environments, a single MongoDB instance can be used to host all Casewhere databases, providing a straightforward and easy setup. However, for high-performance systems where strict Service Level Agreements (SLAs) are required, it is recommended that the database workloads be separated into multiple replica sets. This approach helps optimize performance, scalability, and reliability.
- Read workload
- CasewhereData
- CasewhereFileStorage
- CasewhereHangfire
- CasewhereKeys
- Write workload
- CasewhereEvents
- CasewhereLog
We also recommend using private domain names to reference the VMs instead of IP addresses. For example, use "cw-prod-mongo1.casewhere.db".
4. Deploy Web server
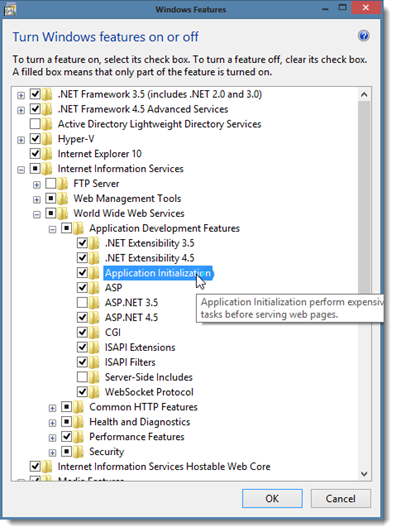
4.1 Add IIS Window Feature
To install Window Features: Internet Information Service (IIS) 8.0+ with Application Initialization, we will use:
The Turn Windows features on or off tool.
Or use the Powershell script below:
Install-WindowsFeature -Name Web-Server -IncludeAllSubFeature
4.2 Install Casewhere service certificates
Install the following certificates at the corresponding locations. Each certificate is described in detail here.
| Certificate | Sample File | Install location |
|---|---|---|
| SSL Certificates | wildcard.casewhere.com.pfx | Local Machine/Personal |
| Data protection | encrypt.casewhere.com.pfx | Local Machine/Personal |
| Service Provider Signing | serviceprovider.signing.casewhere.com.pfx | Local Machine/Personal |
| IdP Login Public Key | Login Signing Cert.cer | Local Machine/Trusted People |
Prepare the SSL certificates for your websites. See the guidelines here for installing an SSL certificate in IIS.
Grant access for IIS_USRS user to access the private keys:
- Open Windows Certificate Manager (run
certmgr.mscfrom the command prompt). - Navigate to Personal > Certificates.
- Right-click on installed private certificates one at a time, and select All Tasks > Manage Private Keys.
- Add local IIS_IUSRS user with full-control permission.
4.3 Create application pools
Each Casewhere site must have a dedicated application pool. It means you must create four application pools for Casewhere Admin, Casewhere Job, Casewhere Api, and Casewhere Site.
In the Advanced Settings for each application pool, make sure the following are correctly set up:
- Start Mode: Always Running
- Identity: Network Service
- Idle Time-out: 0
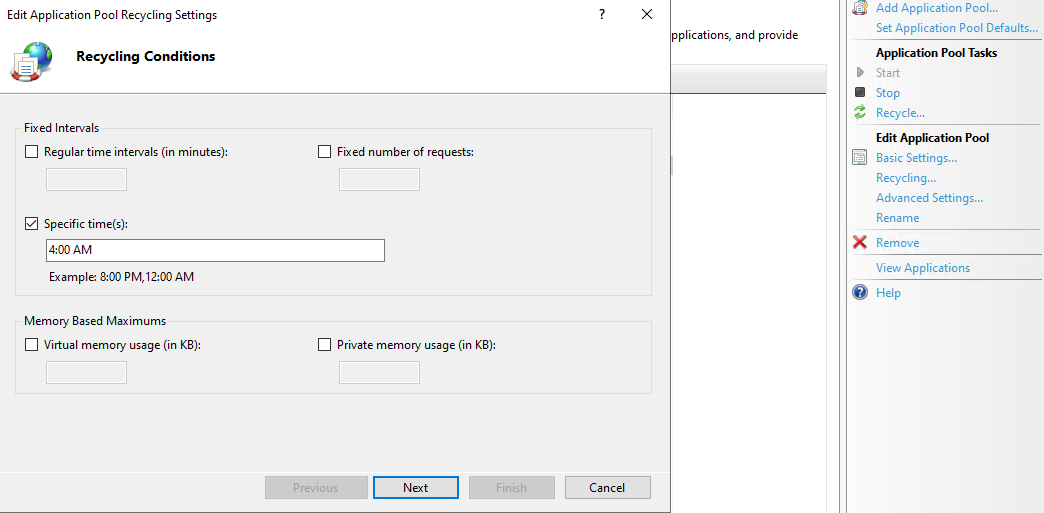
To optimize performance, ensure that each application pool is recycled during your system's least busy times. Select the pool, and click Recycling in the Actions pane:
4.4 Create websites
Extract the Casewhere deployment package to the physical path.
For each Casewhere site, please create a new website and associate it with the corresponding application pool.
| Site name | Casewhere source (Physical path) |
|---|---|
| Casewhere Web | Casewhere.Worker.Web |
| Casewhere Api | Casewhere.Worker.Api |
| Casewhere Admin | Casewhere.Configuration.Web |
| Casewhere Job | Casewhere.Hangfire |
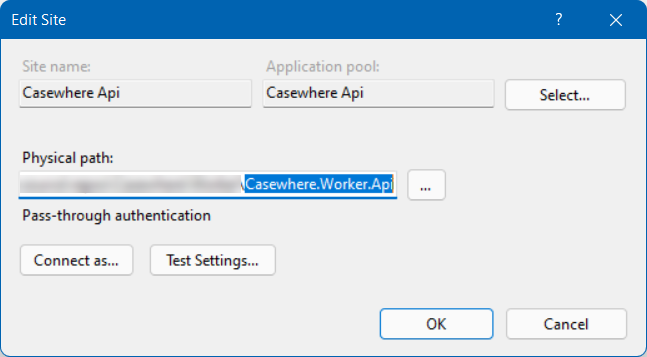
The following must be configured correctly:
- Binding: Https
- Hostname: the website domain name
- SSL certificate: the SSL certificate that you installed in the previous step
HTTP Bindings
To enable multiple worker sites using different domains, we need to bind all the domains to Casewhere Web - Casewhere.Web.CaseWorker. Select the website, then select Bindings in the Actions sidebar.
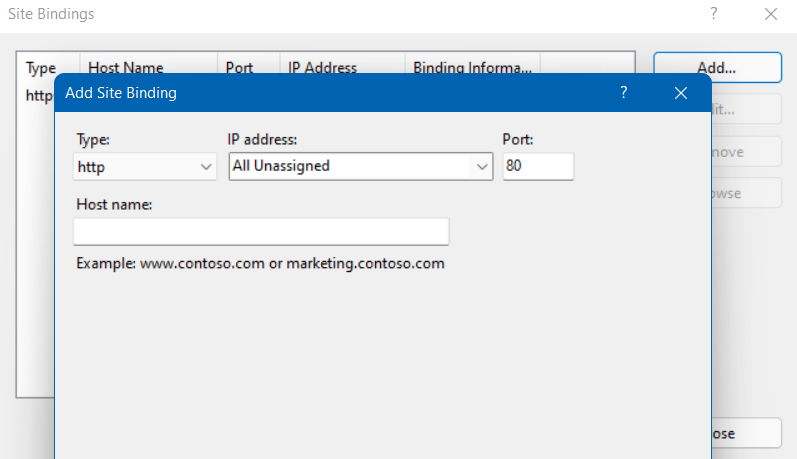
Here you must create bindings for both HTTP and HTTPS. For HTTPS, make sure you select the right certificate corresponding to your site's domain.
Set up HTTP/HTTPS redirect in IIS
Make sure you create HTTP bindings for all the site domains. Follow this article to set up HTTP/HTTPS redirect in IIS.
5. Configure application settings
Make sure you review and edit the settings in the web.config files for all Casewhere sites. You can use the default values for many settings, but you must update the database connection strings, file storage, identity provider, and certificates.
You can get database connection strings here.
If you don't know what a key is about, you can find it in Configuration settings - a complete list of all Casewhere settings.
You can also learn more about the service certificates for Casewhere here.
Configure API key for the background job
Update the following keys in both Casewhere Api (Worker.Api) and Casewhere Job (Hangfire). These keys protect communication between the two sites.
| Key | Sample value | Description |
|---|---|---|
| cwjobs:RuntimeApiKey | 8sK/3irhASZR/1orkNa50i3vvpSjKn/l7epMRIKSF4g= | A secret string |
| cwjobs:RuntimeApiEndpoint | https://cw-prod-api.casewhere.com/external/v0.1/ | Link to your Casewhere Api |
6. Authentication for Casewhere Admin and Casewhere Job
Follow this guideline to configure authentication for Casewhere Admin (Configuration.Web) and Casewhere Job (Hangfire). When this step is done, you can login to Casewhere Admin and start configuring your Casewhere solution.
7. Configure auto pings
To keep the sites always alive, we need to configure the auto-pings as below.
Create a PowerShell script file named auto-ping.ps1 with below content:
Invoke-WebRequest https://<Casewhere Api>/api/v0.1/ping
Invoke-WebRequest https://<Casewhere Job>/ping
Invoke-WebRequest https://<Casewhere Admin>
Invoke-WebRequest https://<Casewhere Web>
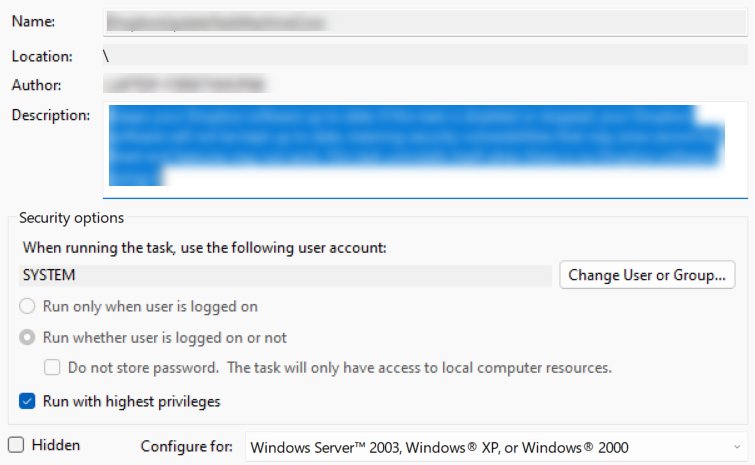
Open Task Scheduler to create a daily task that executes the script every 5 minutes:
Program/Script: C:\Windows\System32\WindowsPowerShell\v1.0\powershell.exe
Add arguments:
-windowstyle hidden C:\Casewhere\auto-ping.ps1
Make sure the task always with runs whether user is logged on or not.