Create a worker site
Introduction
In this tutorial, you will use the Casewhere Admin site to create a worker site for your application. (Read Worker site overview for more)
This tutorial will be divided into 2 parts:
In Part 1, you will learn how to add a default theme and configure the language.
If your Casewhere instance is brand new and this is your first deployment, the steps in this section are critical.
If you're familiar with themes and languages or your Casewhere instance has themes and languages configured, you can skip this step.
In Part 2, you will learn how to create a worker site with a URL accessible from the internet.
You will set this link to be available for anonymous users, meaning anyone with the URL can see and interact with your application without any authentication requirement.
We will walk through other authentication options of Casewhere, such as SAML 2.0 (i.e., integrating KK NemLog-in), username & password, and WS-Federation in the more advanced tutorials.
Guide
Part 1. Add default theme and set language
- Step 1. In Casewhere Admin site, navigate to Themes, click Create button

| Field name | Actions |
|---|---|
| Name | Fill in "Tutorial" |
| Description | Fill in "Default theme for the getting started tutorial" |
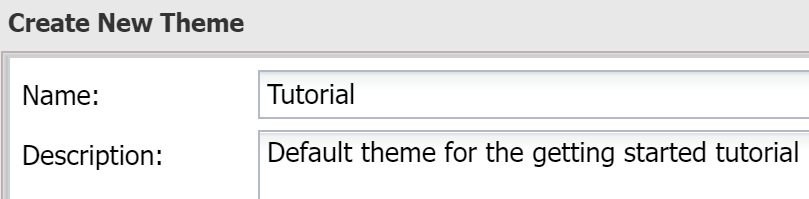
Click Save All & Close
- Step 2. Navigate to Text Resources, click Set Languages button

Click Add button 
The Create Language dialog will open.
| Field name | Actions |
|---|---|
| Culture | Select "English" |
| Title | Fill in "English" |
| Default | ☑ |
Done! English is successfully added as the default language for all of your products.

Part 2. Create a worker site
- Step 1. In Casewhere Admin site, navigate to Worker Sites.
- Step 2. Click Create button
The Create Worker Sites dialog will appear.
- Step 3. Config General setting tab
| Field name | Actions |
|---|---|
| Name | Fill in "Cw Bookstore Site" |
| Domain name | Fill in "academy.casewhere.com/cw-bookstore" |
| Is Https? | ☑ |
| Title | Fill in "Cw_Bookstore_Site" |
| Theme | Choose "Tutorials" theme |
| Is active? | ☑ |
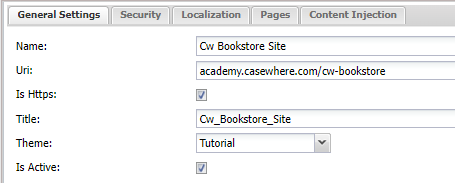
Tip: The Domain name will also be the URL to your application.
- Step 4. Config Security tab
| Field name | Actions |
|---|---|
| Enable Anonymous User | ☑ |
| IdP Connection | Choose "None" |
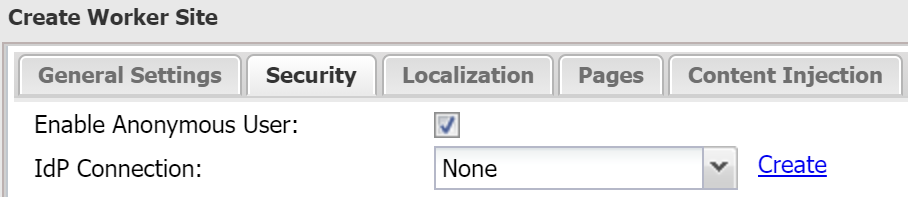
Click Save
Way to go! Your website is now activated at https://academy.casewhere.com/cw-bookstore
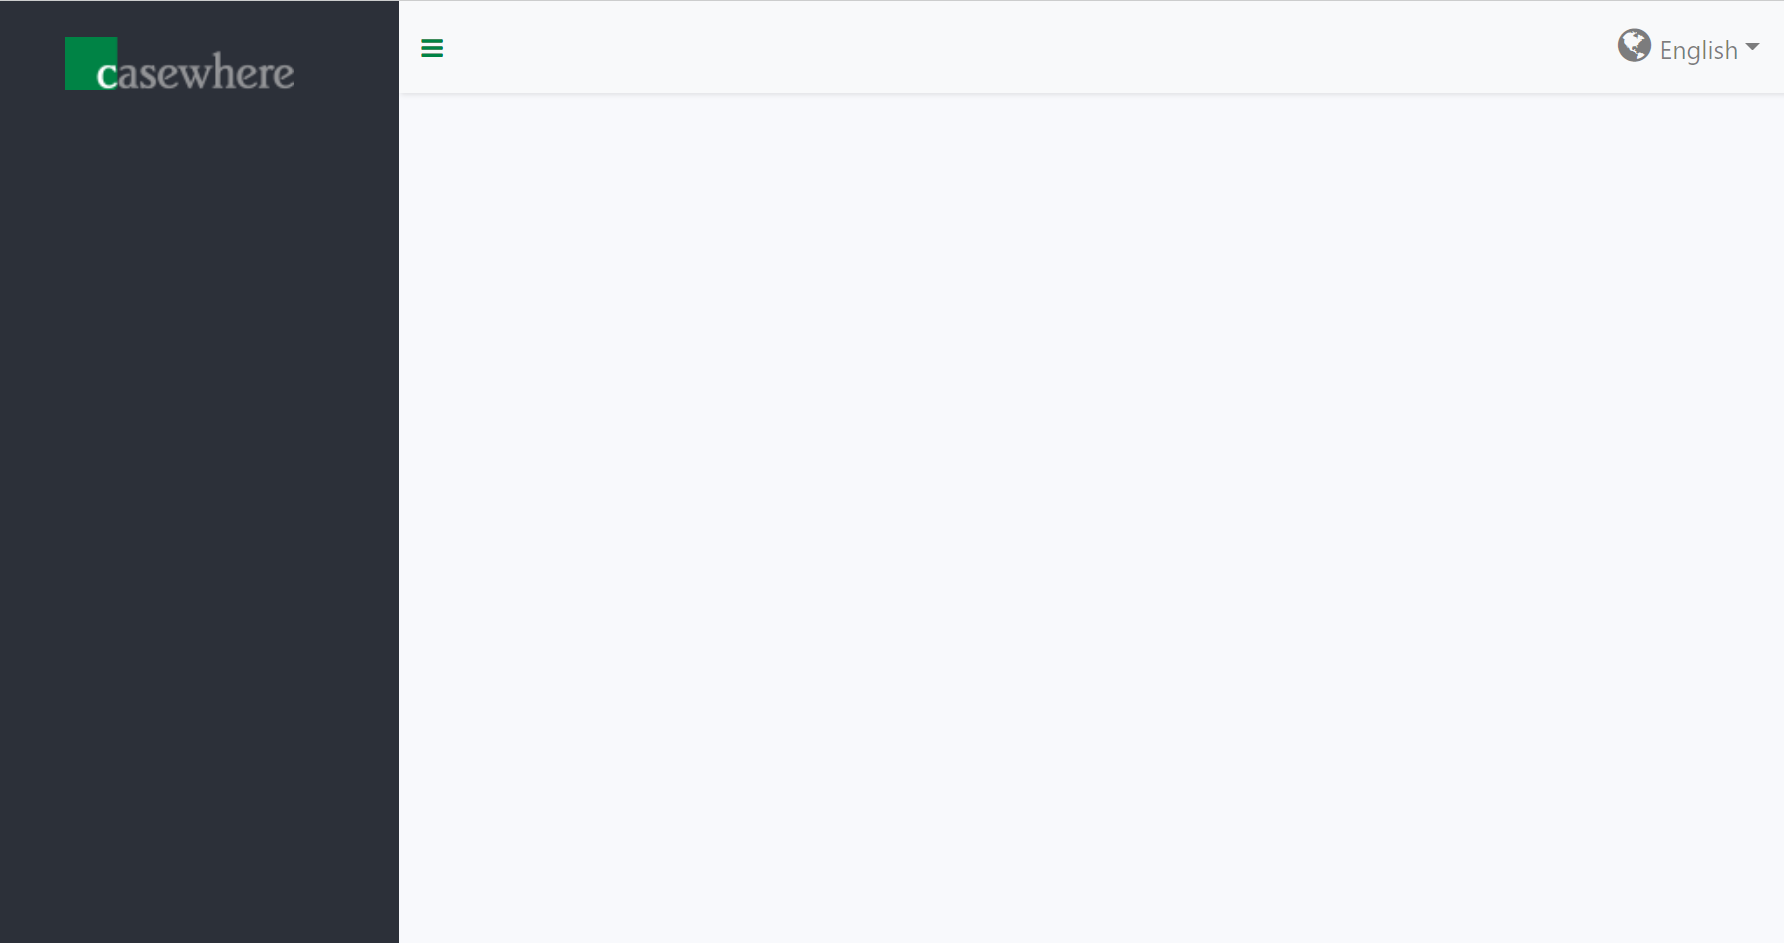
You now have a worker site with a basic layout that contains a logo, a menu icon, and a language menu. In the next step, you will learn to make a page and link it with this worker site!