Enable multi languages
Introduction
Many Casewhere applications are created for users who come from different countries and/or speak different languages.
This tutorial will demonstrate how to enable multi languages for the three action buttons: add new book, edit book, and delete book that you already created in the previous steps.
Guide
Part 1. Create and manage multi language text
- Step 1. In Casewhere Admin site, navigate to Text resources
- Step 2. Click Set Languages button

Languages dialog will show up
- Step 3. Click Add button

Create languages dialog will show up
- Step 4. Choose the language that you want to create text with, here in this tutorial we will demonstrate with Danish
| Field name | Actions |
|---|---|
| Culture | Select "Danish (Denmark)" |
| Show on Resource List | ☑ |
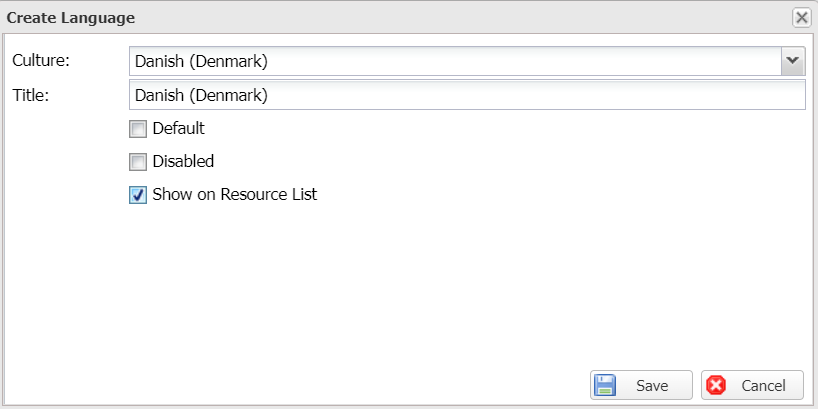
Click Save
You should see the column's name "da" is now added to Text resources screen next to the column "en"

Those columns are where you will fill in the English and Danish version of your strings.
- Step 5. Click Add button . Fill in the table as follows:
| Field name | Actions |
|---|---|
| Key | Fill in "Add new book" |
| en | Fill in "Add new book" |
| da | Fill in "Tilføj ny bog" |
| Description | Fill in "Action button for adding a new book" |

Click Update
Part 2. Enable multi languages
- Step 1. In Casewhere Admin site, navigate to Pages
Choose the pages name "book-list" that you already made in create a page step
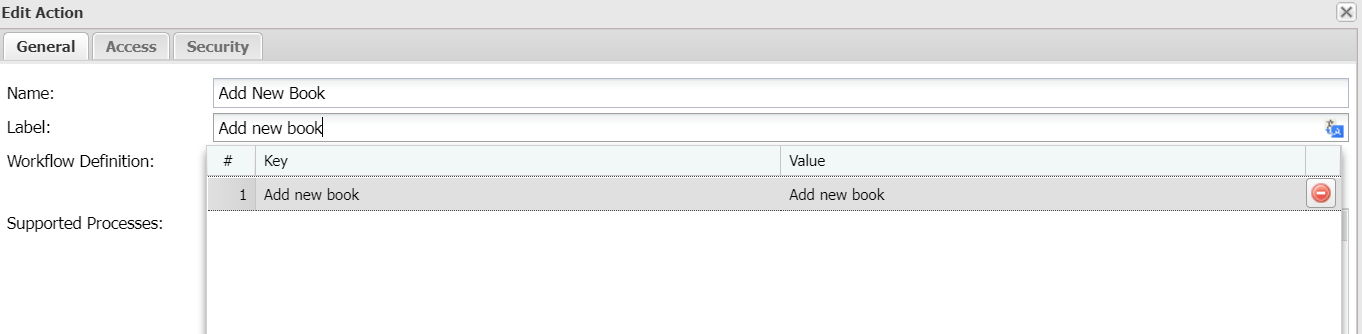
- Step 2. Choose Add New Book action button and select Edit Action
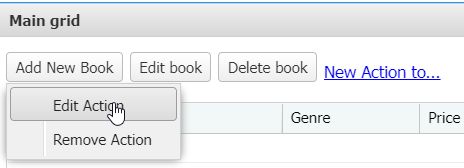

On the drop down menu, choose the key value that you added in Step 6.
- Step 3. Reload your page
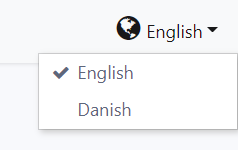
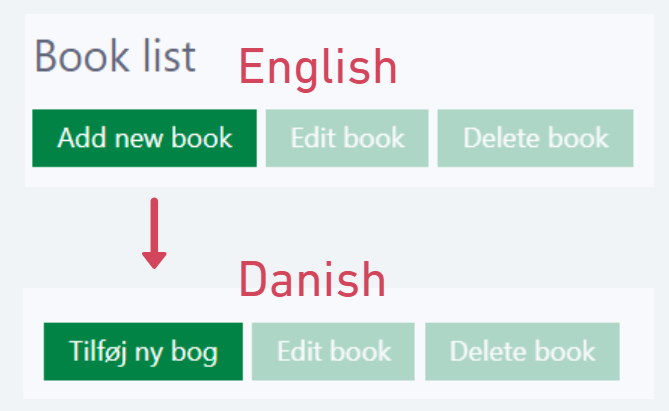
Now in the top right side, switch languages from English to Danish.
The string "Add New Book" will be changing as you switch between two languages.
- Step 4. Way to go! Now let go back to Text Resources screen and add other translated strings follow part 1 of this tutorial
| Key | en | da-DK | Description |
|---|---|---|---|
| Add new book | Add new book | Tilføj ny bog | Action button for adding a new book |
| Edit book | Edit book | Rediger bog | Action button for editing book |
| Delete book | Delete book | Slet bog | Action button for removing book |

- Step 5. Repeat step 1,2, and 3 of this part for the "Edit book" and "Delete book" buttons
Reload your site to see the result.

Tip: Text Resource icon
is the indicator that the field is translatable.
With Casewhere, all the labels that will appear on the user interface (UI) are able to be translated, it includes:
- Buttons
- Menu labels
- Column headers
- Error messages
- Form texts
Part 3. Export and import text resources
You can export your whole text resources list into an .xlsx file, you can edit that .xlsx file and then import it back into Casewhere instance's database.
Step 1. In Casewhere Admin site, navigate to Text resources
Step 2. Click Export button
 to download the .xlsx file
Step 3. Open the .xlsx file. Any label that is missing some translations will be marked in red

Fill in all the missing place in your file and save.

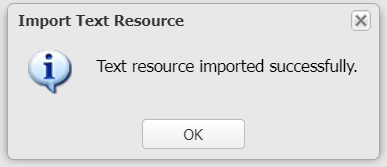
Step 4. Import your edited .xlsx file back into Casewhere by click Import button

Part 4. Text resources - Edit mode
You can enable edit mode to edit faster right in your Casewhere instance.
- Step 1. In Casewhere Admin site, navigate to Text resources
- Step 2. Select Enable Edit Mode check box

Editing view will be enable, allow you to edit all the translation strings in bunch.

Click Save  once you are done editing.
You are ready to move to the next step.