Multiple-step workflows
The article aims to provide guidelines for setting up a long workflow where users must complete multiple steps before submitting their work. It should also allow users to save drafts along the way. Below is an example of what such a workflow might look like.
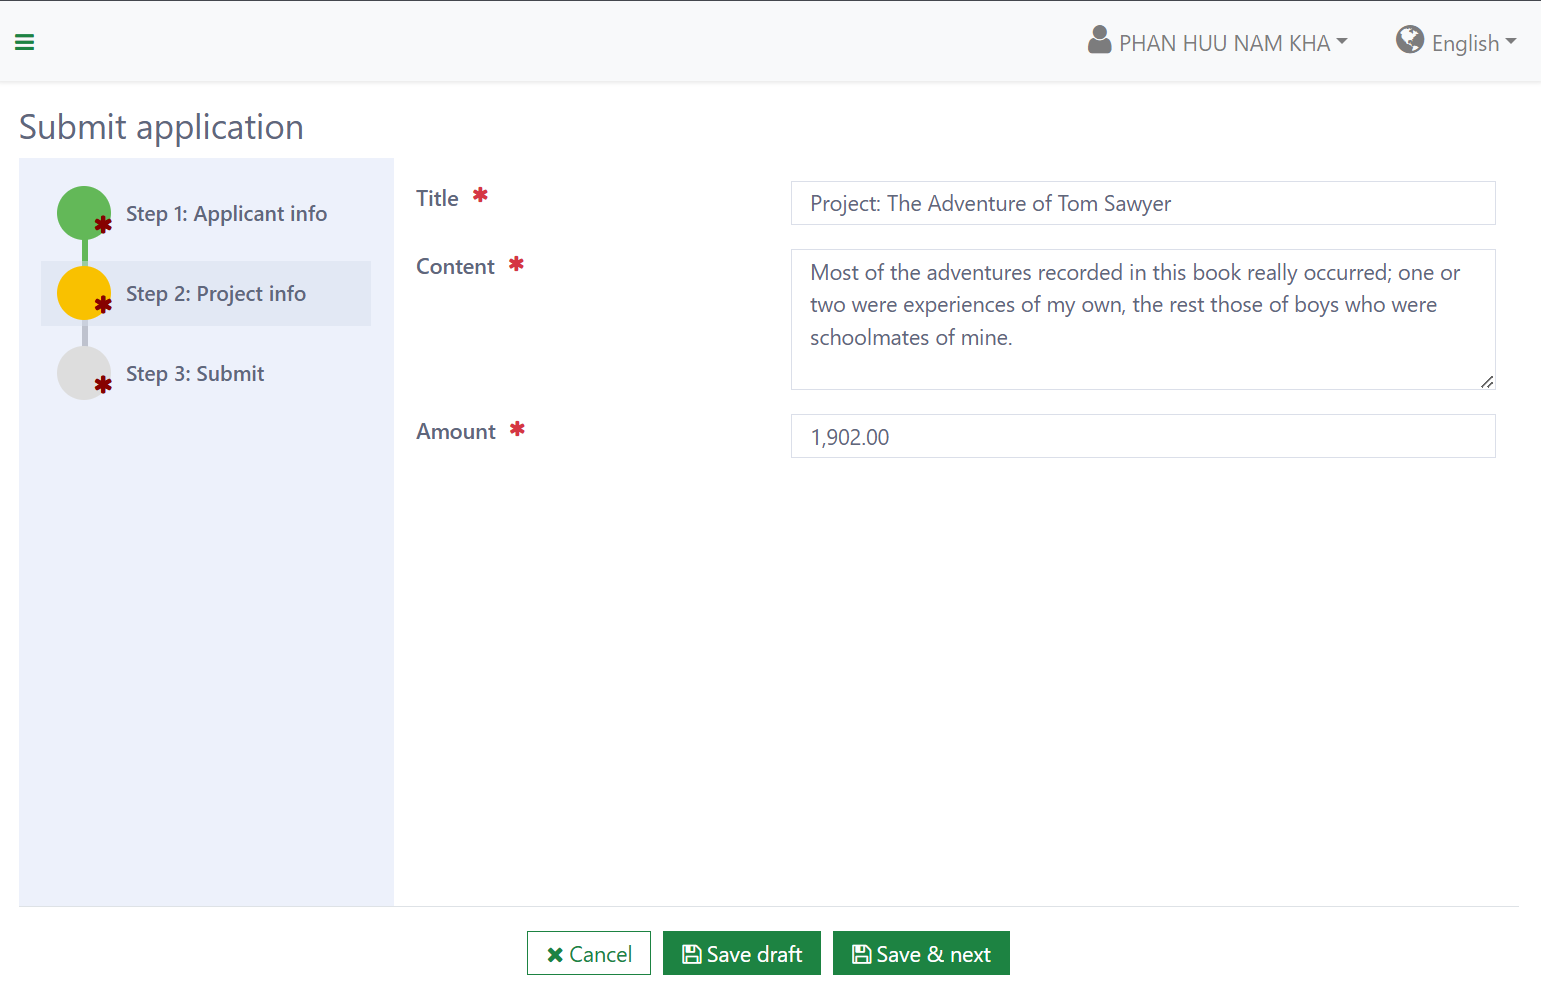
In this article you will learn:
- Enable draft saving
- Let users continue a draft where they left off
- Reuse workflows for both creating and editing cases
- Configure complex workflow navigation
Workflow definition for case editing
Since it's a long workflow with multiple steps and a lot of logic, we should aim to reuse as much code and configuration as possible to save cost for development and maintenance.
The first step is to create a workflow definition that encapsulates the majority of the logic. The workflow outline might look like this:
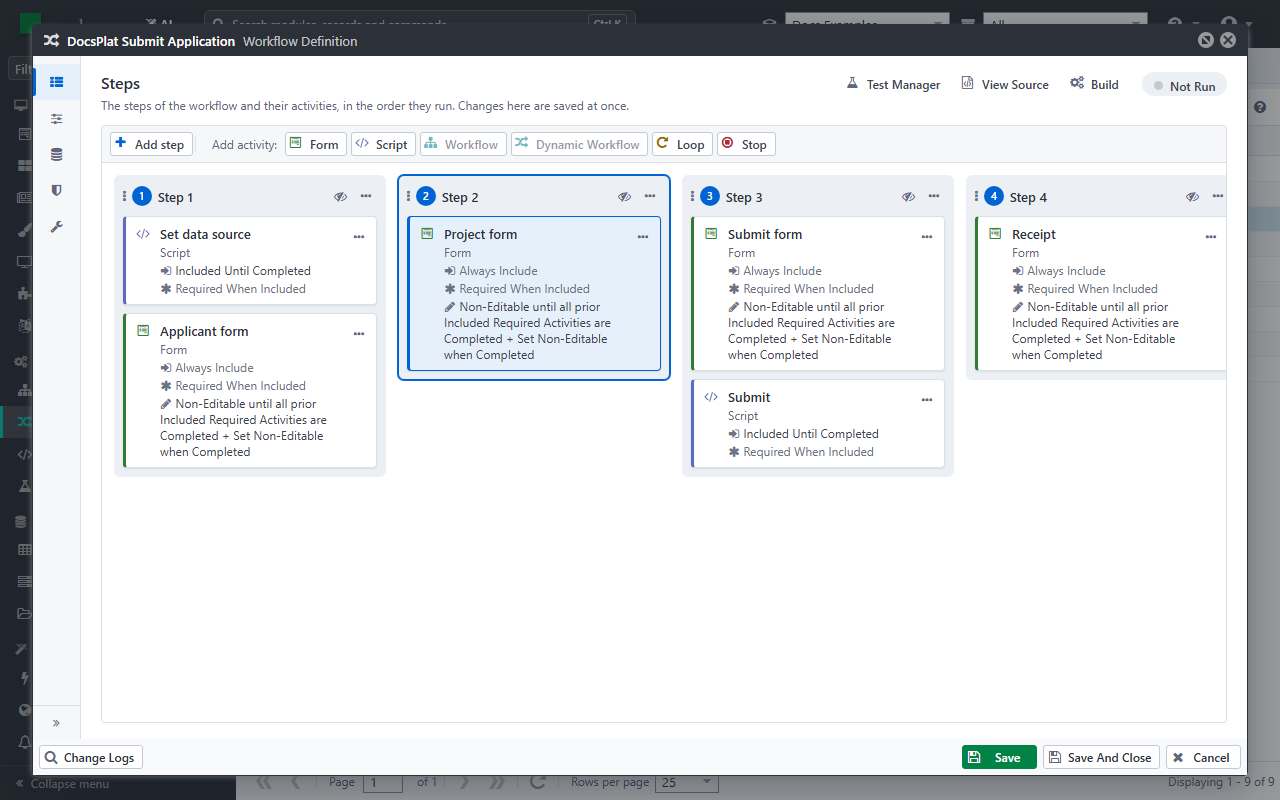
It is beyond the scope of the article to cover every detail of the workflow setup; only the important steps are highlighted below.
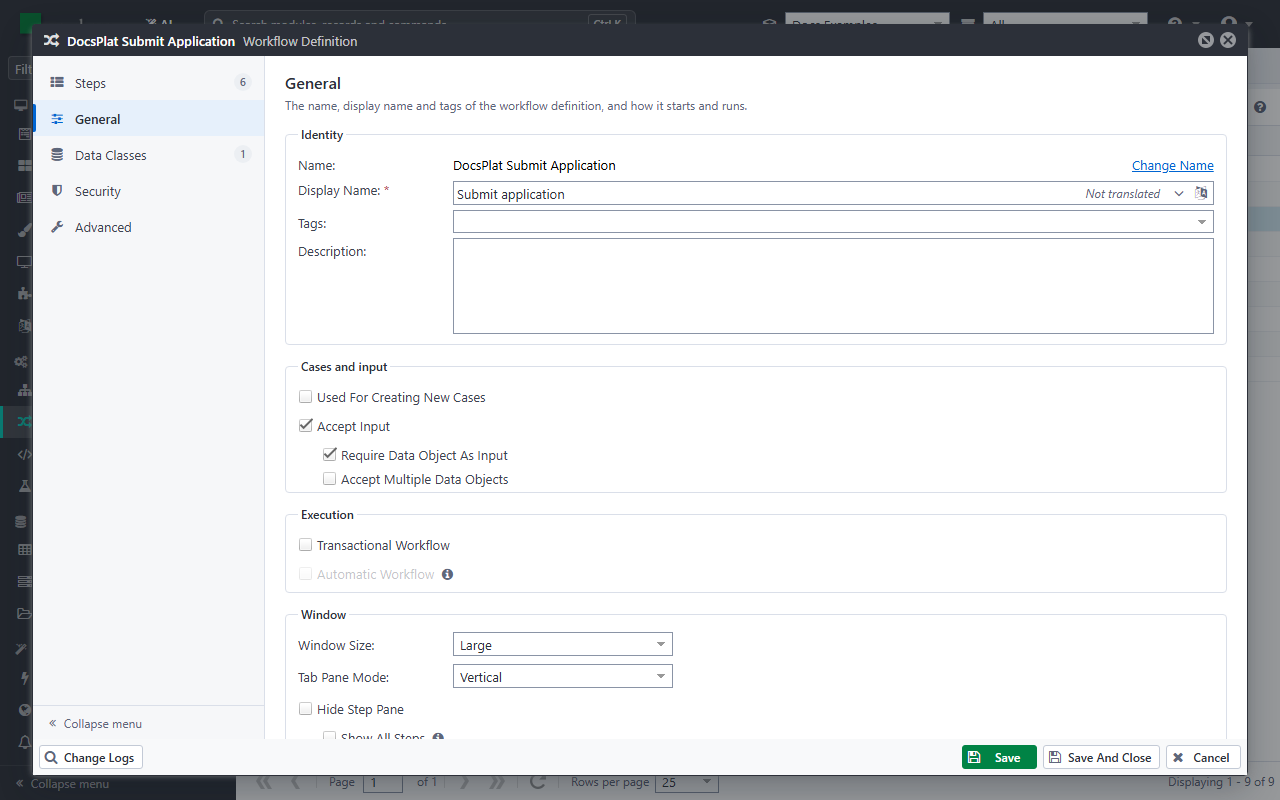
Step 1: Make sure the workflow type is set to 'Case Editing' and that it requires user input.
- Used For Creating New Cases: Off
- Require Data Object As Input: On
Step 2: Make sure the form's data source accommodates both object creation and editing, and supports attaching objects at runtime.
- Reference To: Set to Existing Object
- Data Context: Set to Manual
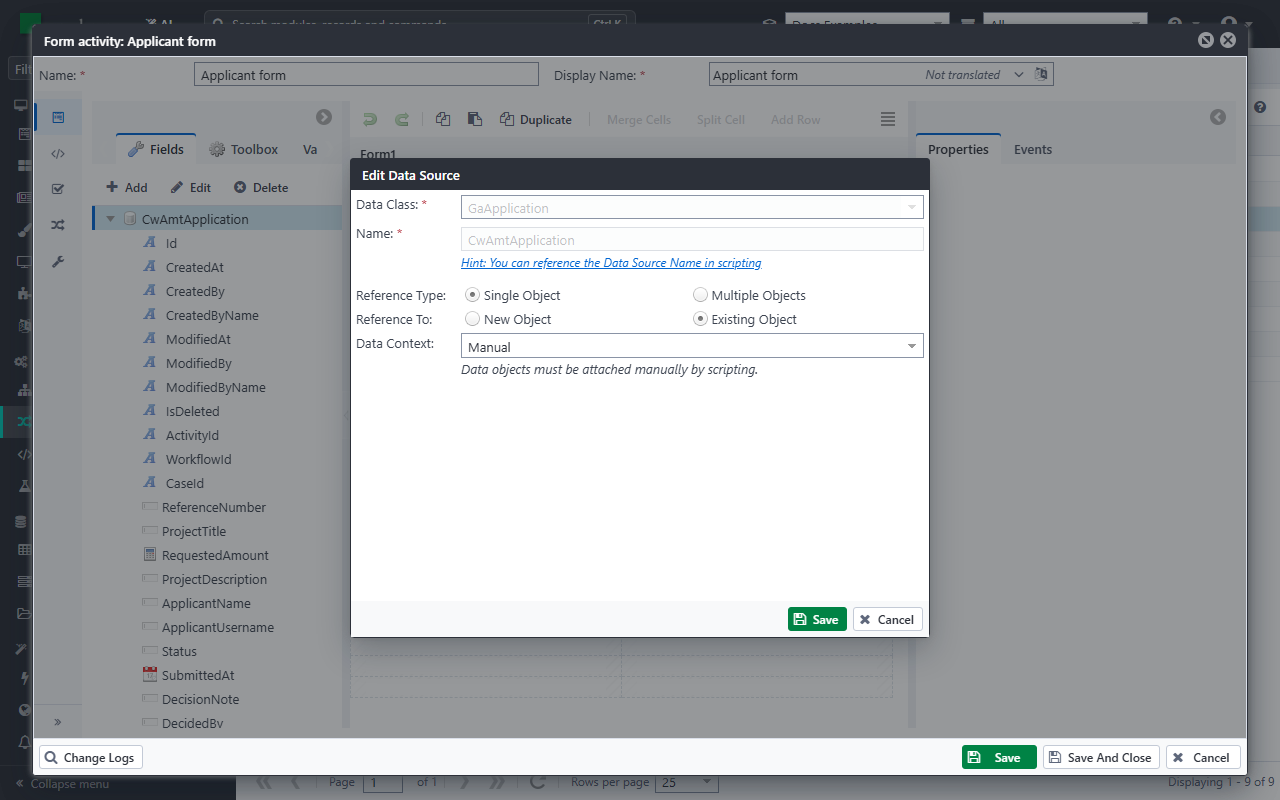
Step 3: Bind the form's data source to the workflow input, if available, to ensure the workflow loads the input object for editing. If no input is set, the workflow will create a new object based on the user's submitted data.
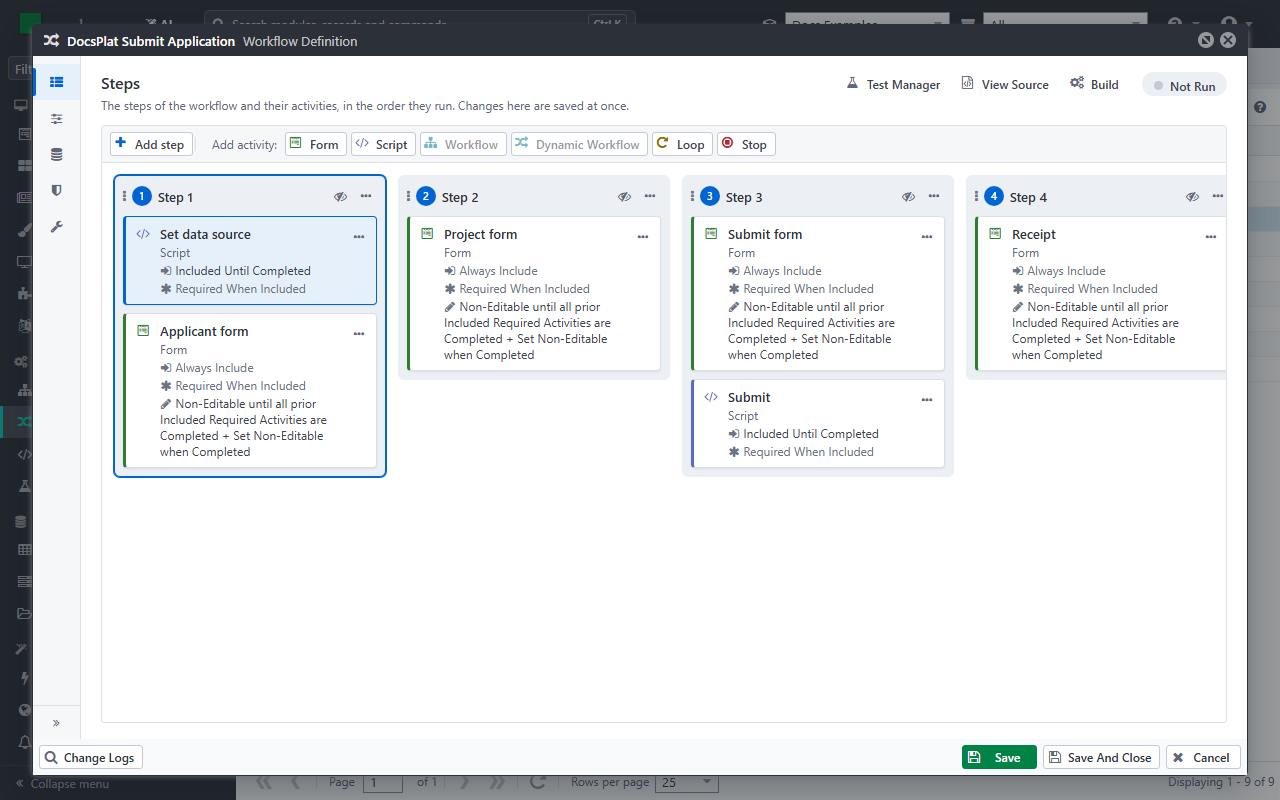
if (ctx.Input != null)
{
    ctx.SetDataSource("CwAmtApplication", ctx.Input.Id);
}
Step 4: Enable the "Save Draft" option in all intermediate forms
- Save Draft: Set to Force Show
- Save Draft Message: A text resource key indicating that the draft has been saved successfully.
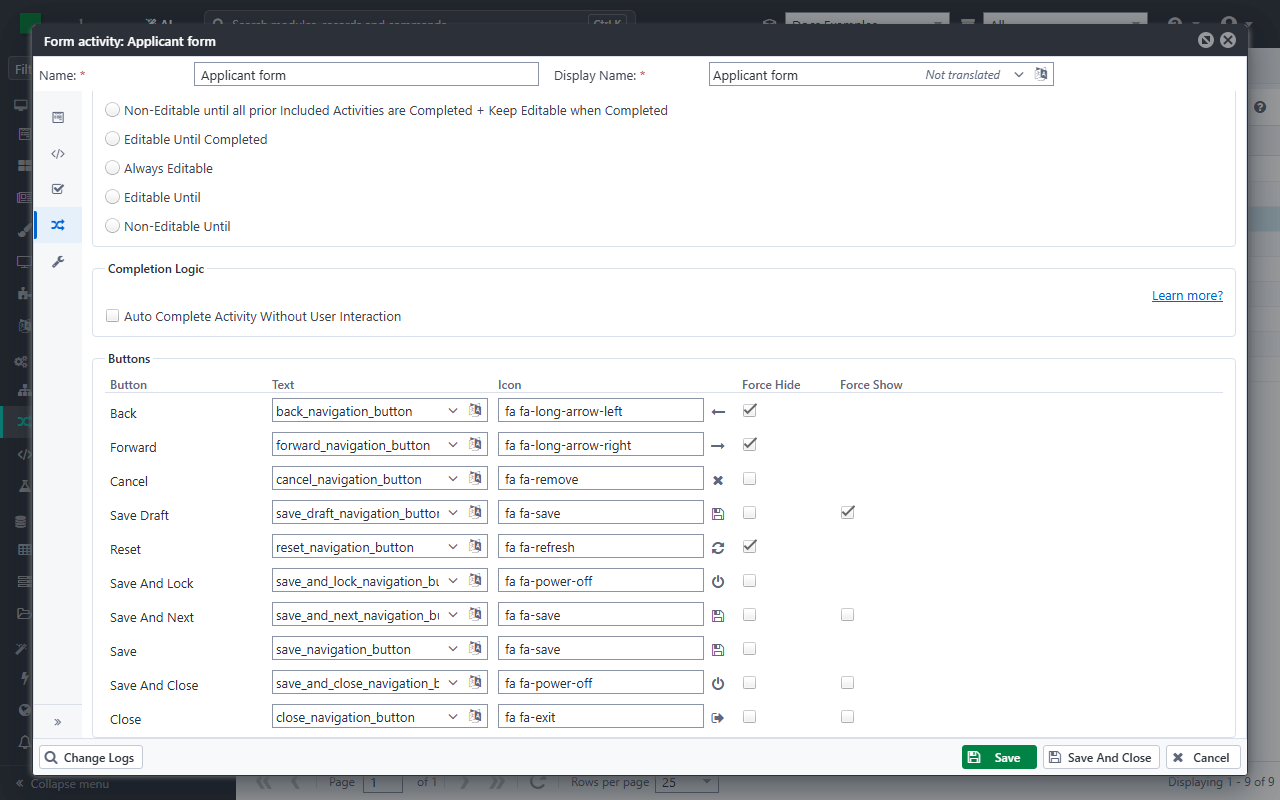
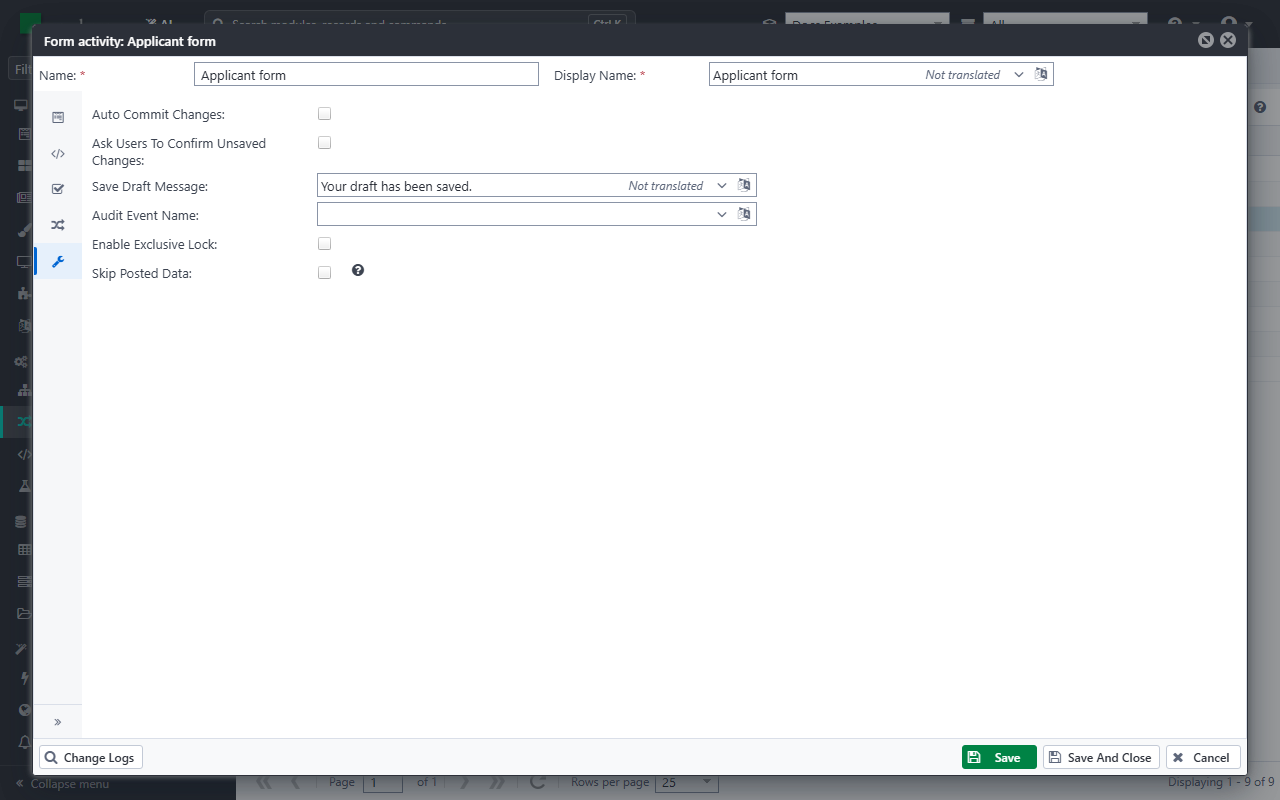
Follow the guideline here to learn more about form activity and draft saving.
Step 5: Optionally, let users continue a draft where they left off. When users edit a draft, the workflow starts at the first form, and they have to go through every step they have already filled in. To skip those steps, tick Auto Complete Activity Without User Interaction in the completion logic of the intermediate forms, with an Only When expression that returns true while the workflow continues a draft. For example, when the forms save the status Draft:
ctx.Input != null && ctx.Input.Get<string>("Status") == "Draft"
The forms whose data is valid then complete by themselves, and the workflow opens at the first step that is missing. See Example 4 - Continue a draft application.
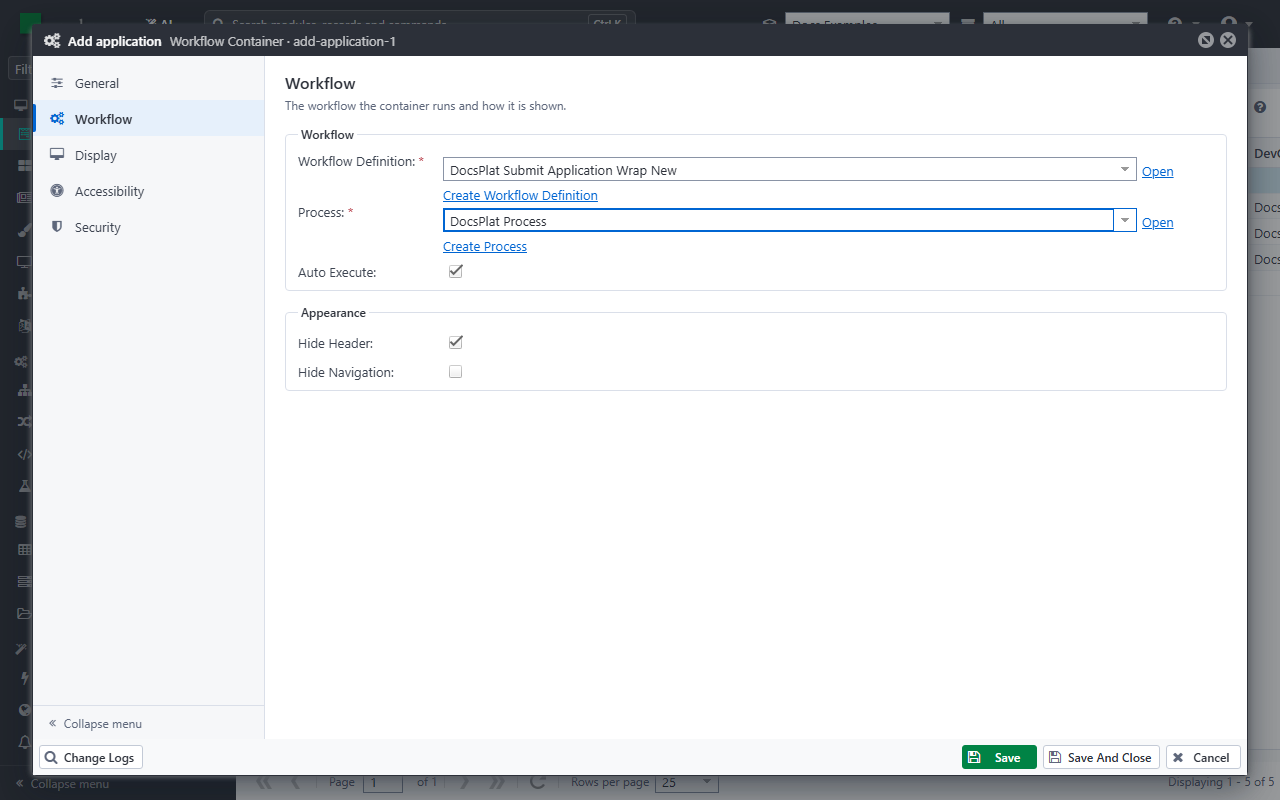
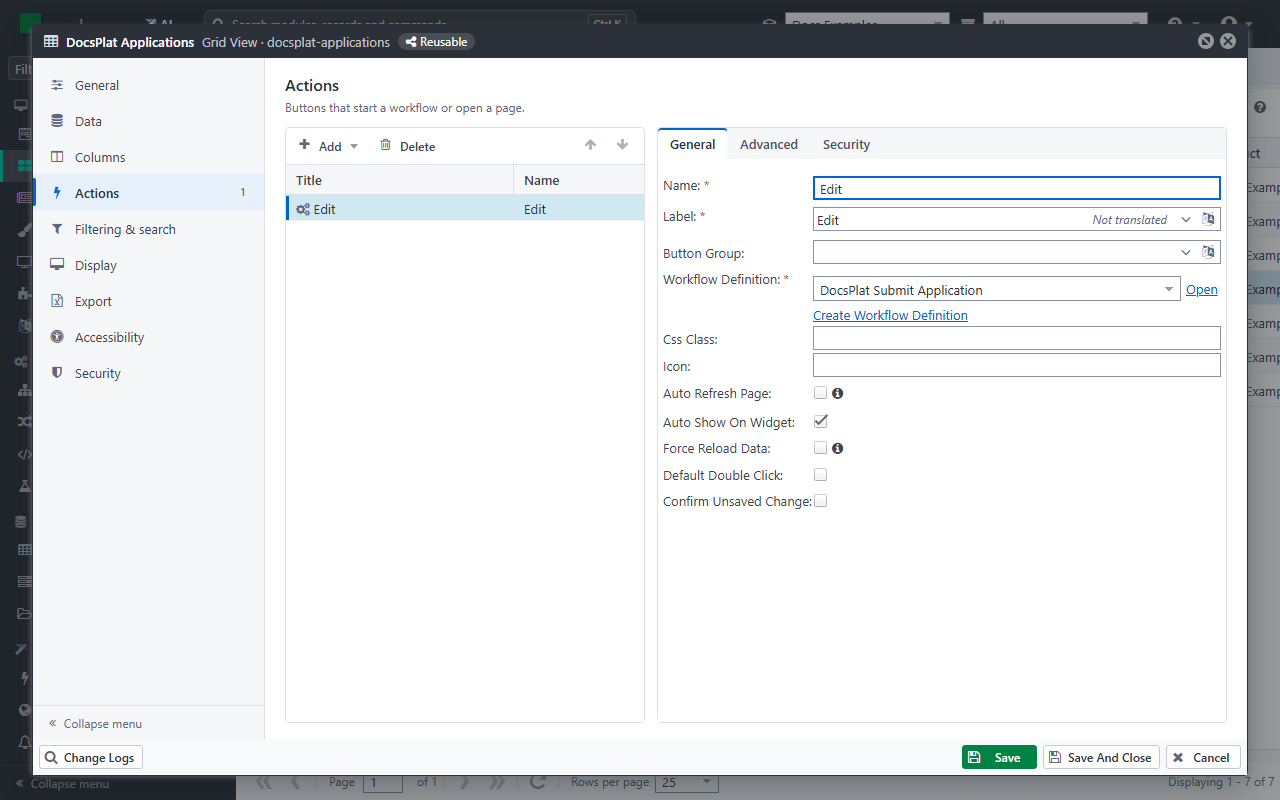
After these steps, you now can use the workflow for data editing. The screenshot below illustrates how to use the create-case workflow in a widget action.
Workflow definition for case creation
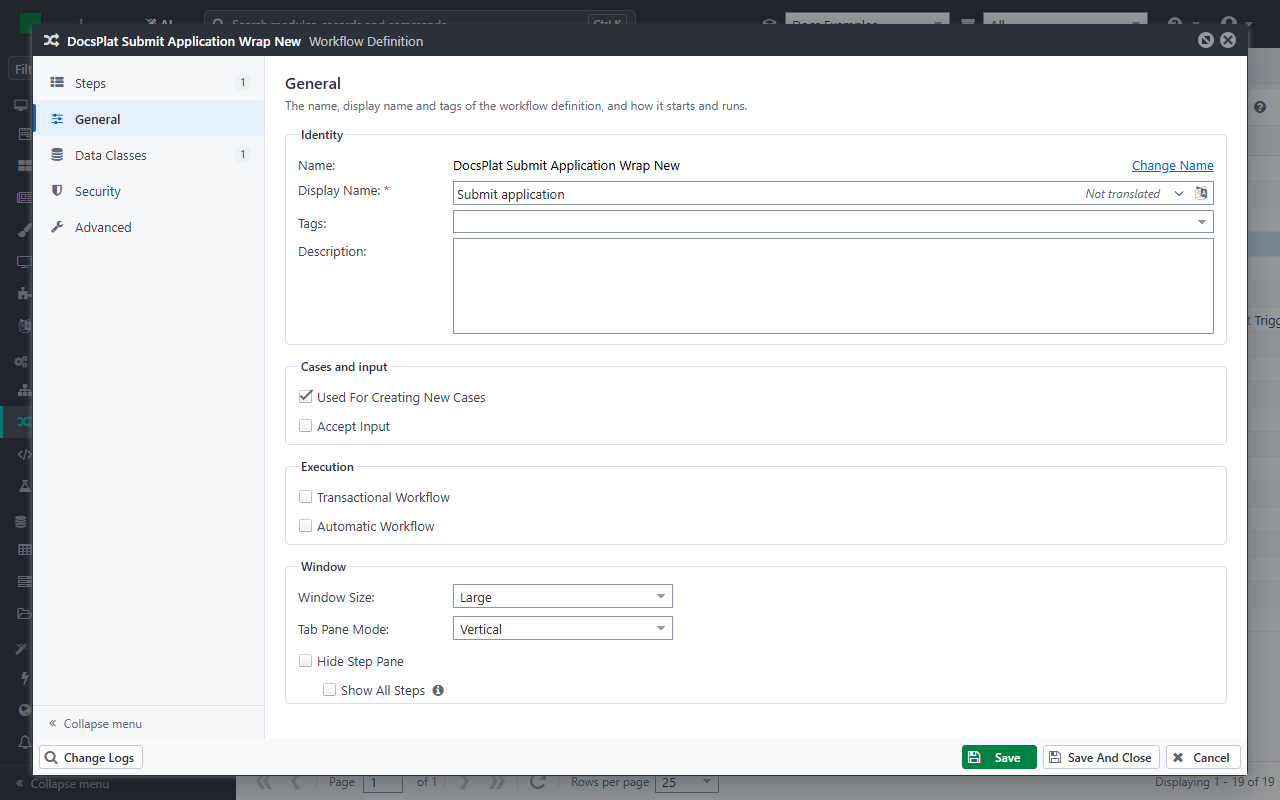
We'll attempt to reuse the case-editing workflow definition created in the previous step. However, first, let's create a new workflow definition for creating cases, as shown below:
- Used For Creating New Cases: On
- Accept Input: Off. You can still enable it if your workflow definition requires input for creating new cases.
The create-case workflow definition will then incorporate the edit-case workflow.
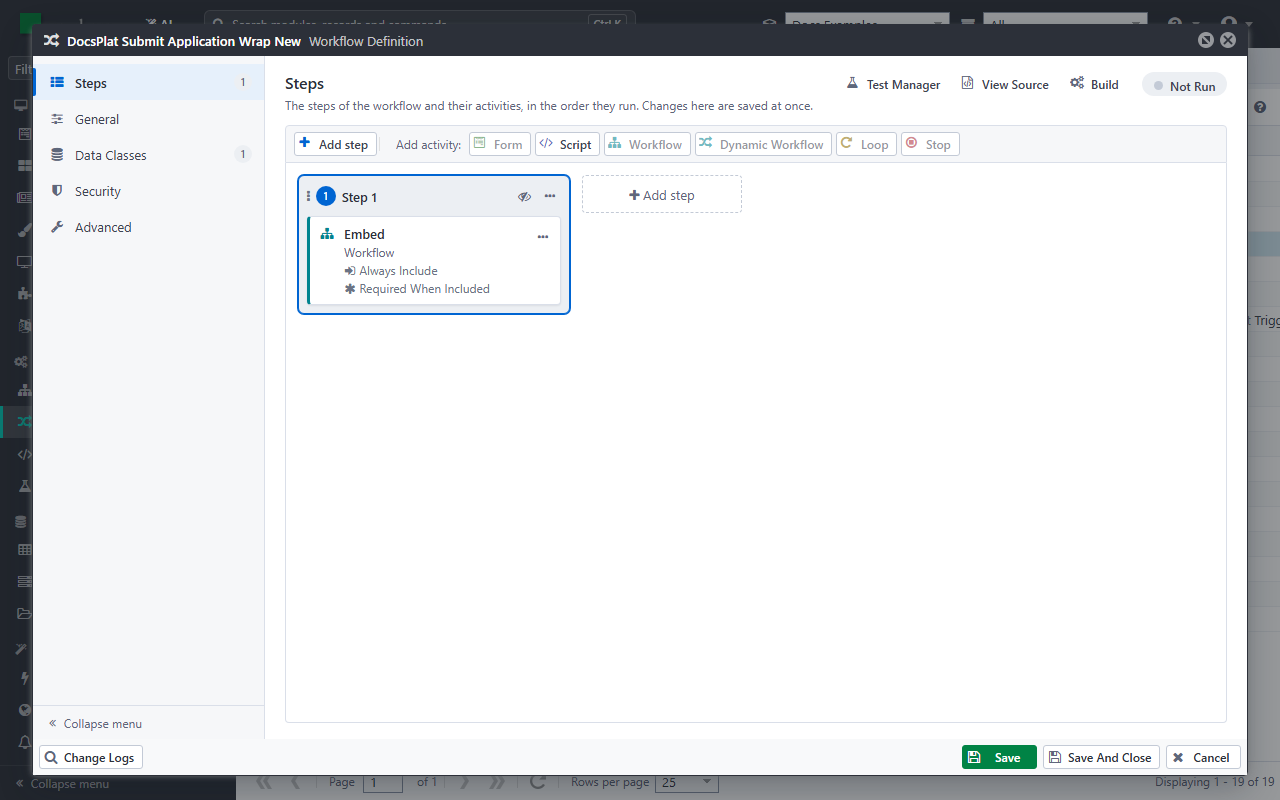
You can now use the workflow definition. The screenshot below illustrates how to use the create-case workflow in a page workflow container widget.